Welcome to my Kitchen!
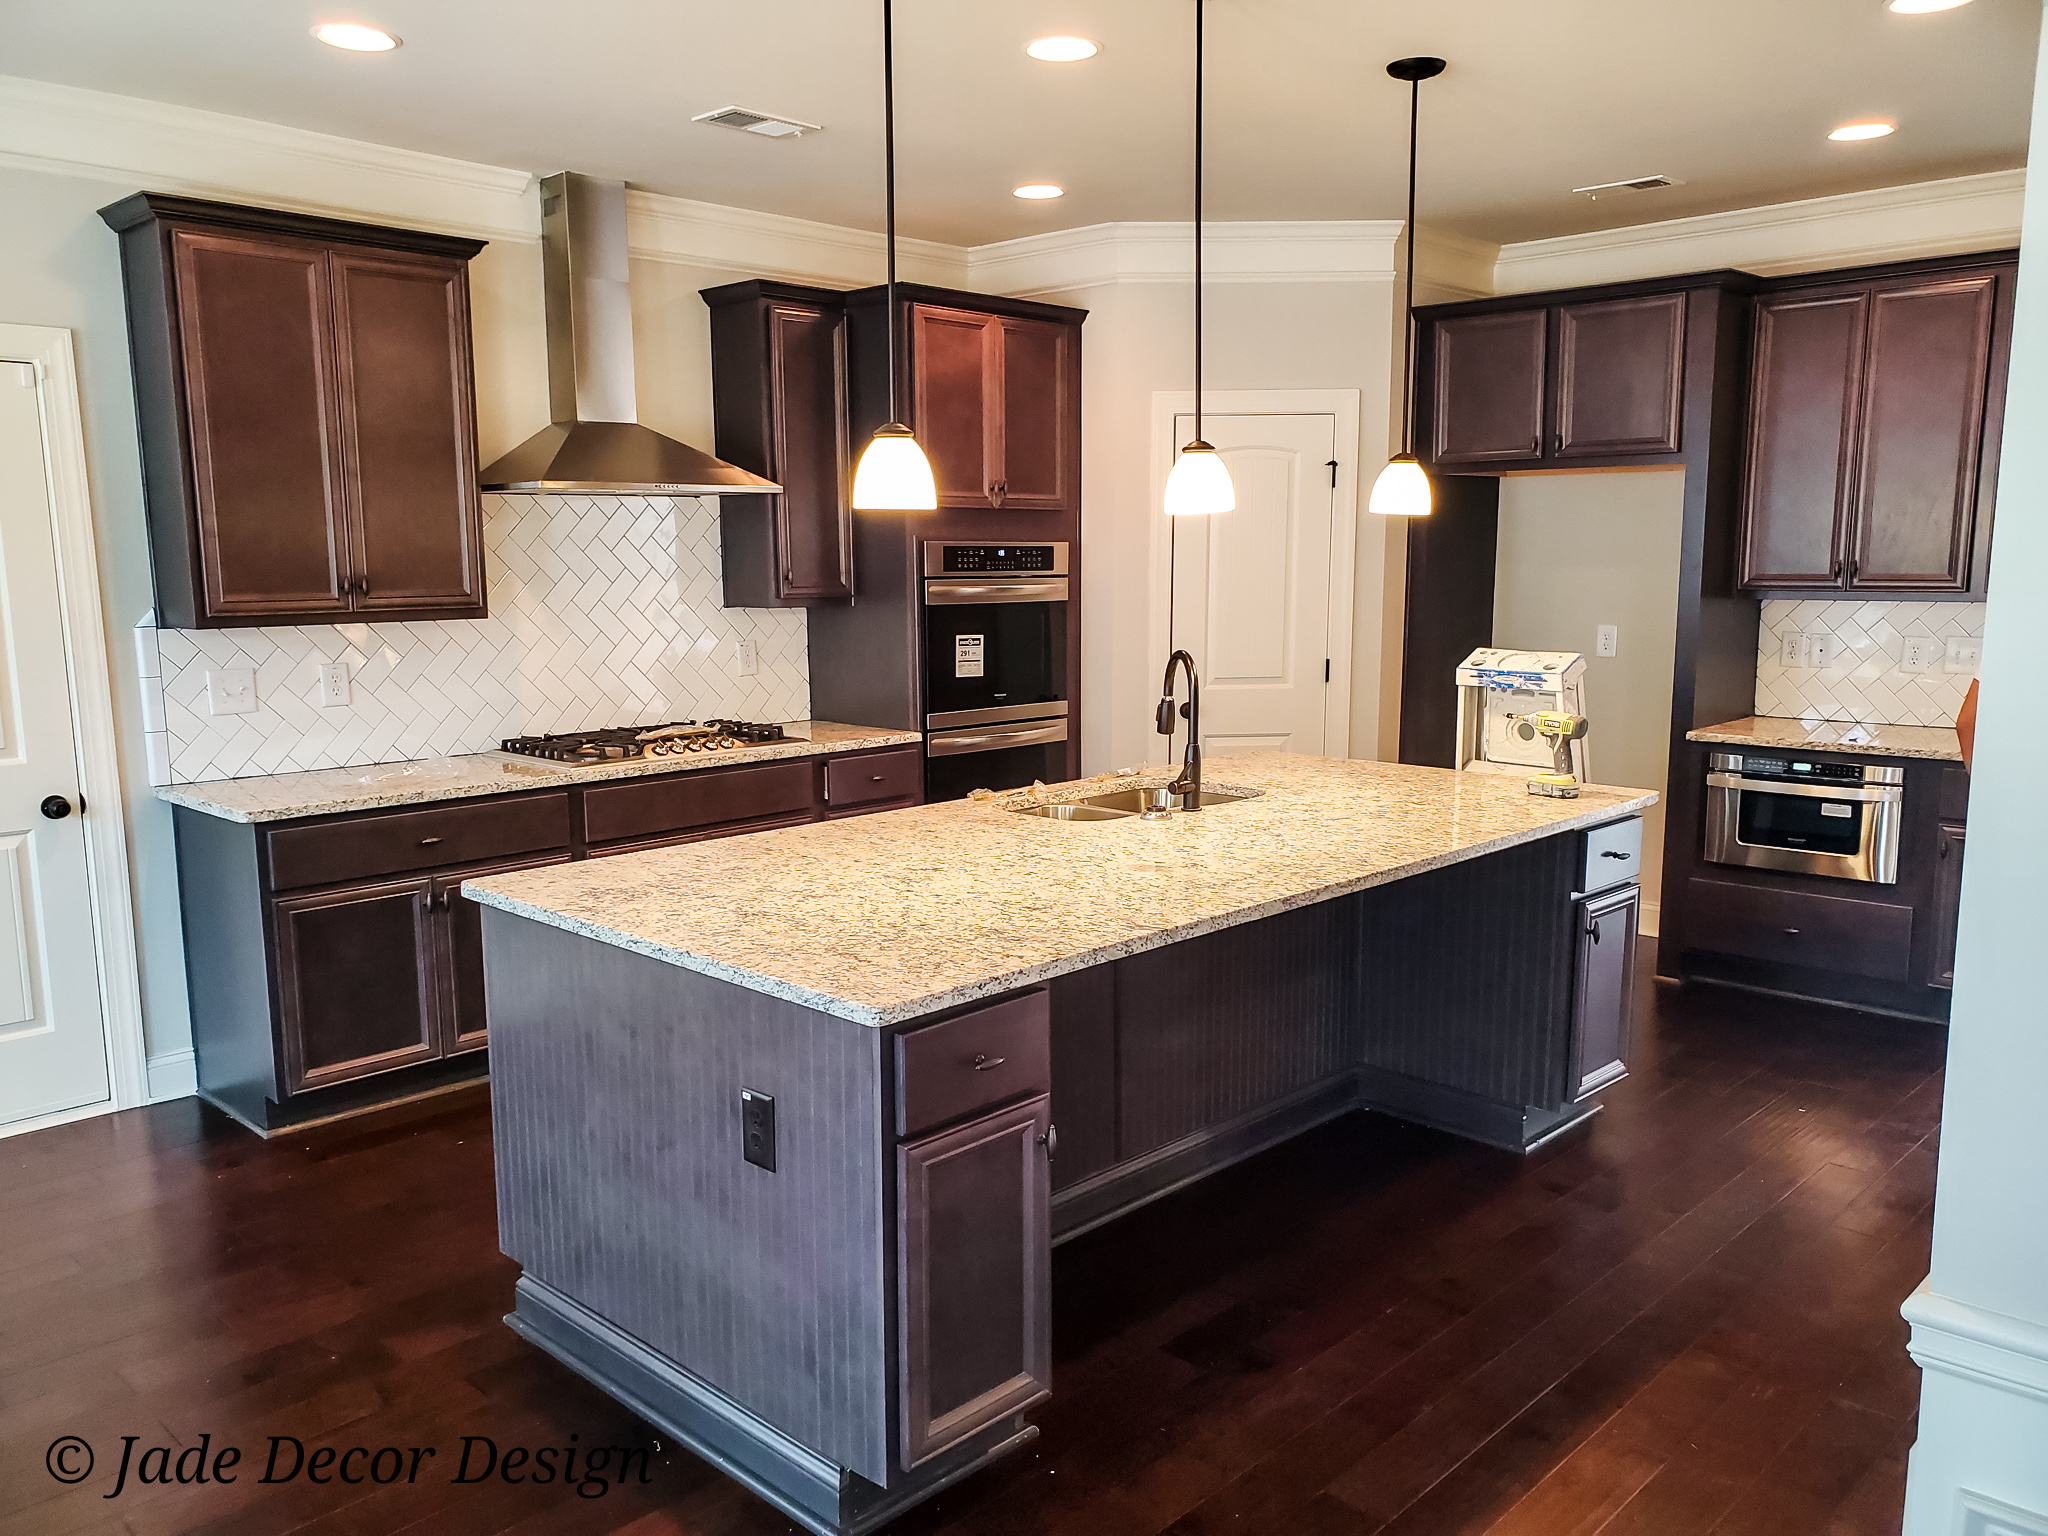
My husband and I built our house in 2019 and were involved in every step of the process. Although this was not a custom build, we had the opportunity to customize the builders floor plan to fit our needs. While searching for a new home, I knew I wanted one with a kitchen that had a big island. This is one of the reasons we fell in love with this house.
While we were selecting our finishes, our builder didn’t have a lot of options and the options they had cost a lot to upgrade. I decided to select the cabinet and stone options that came with the basic package so I could modify the kitchen to my preferences after closing.
Our initial kitchen cabinets were a dark grey color with white granite counter-tops in “Dallas White”. Due to the size of the space this made the kitchen quite dark so I knew I had to change this up to make it light and bright. I was inspired by lots of images on Pintrest which gave me a good idea of what my finished kitchen would look like.
[do_widget id=custom_html-6]
CABINETS
Cabinet Painting: Colors and Technique
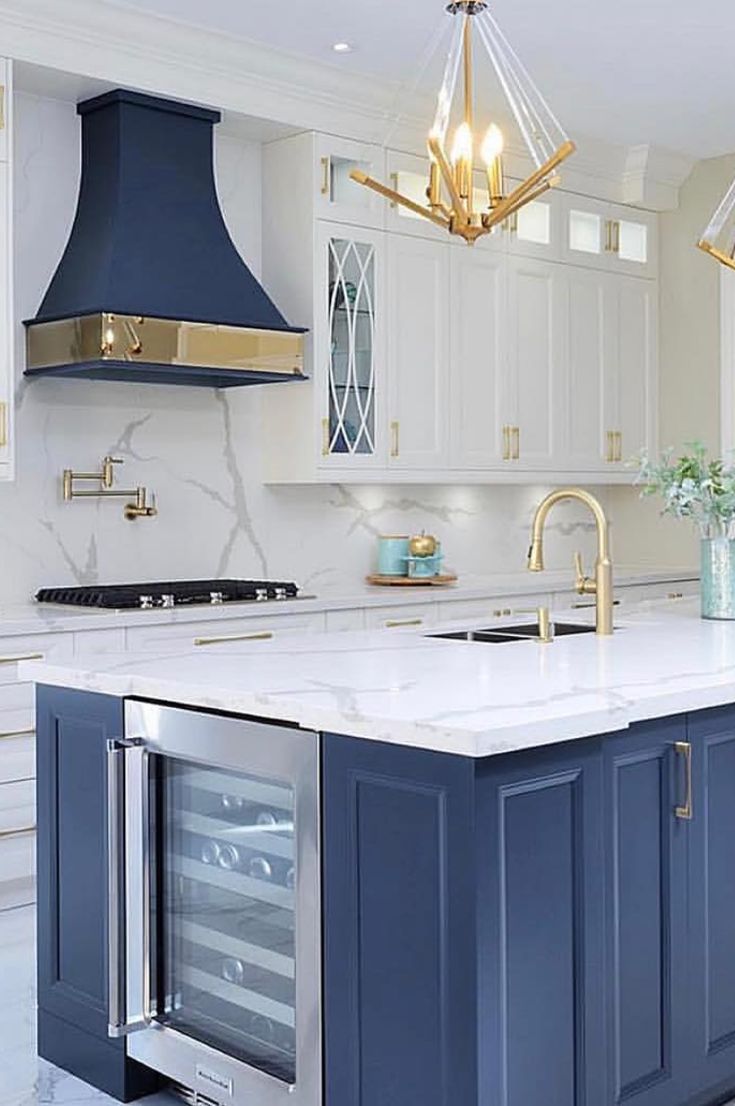
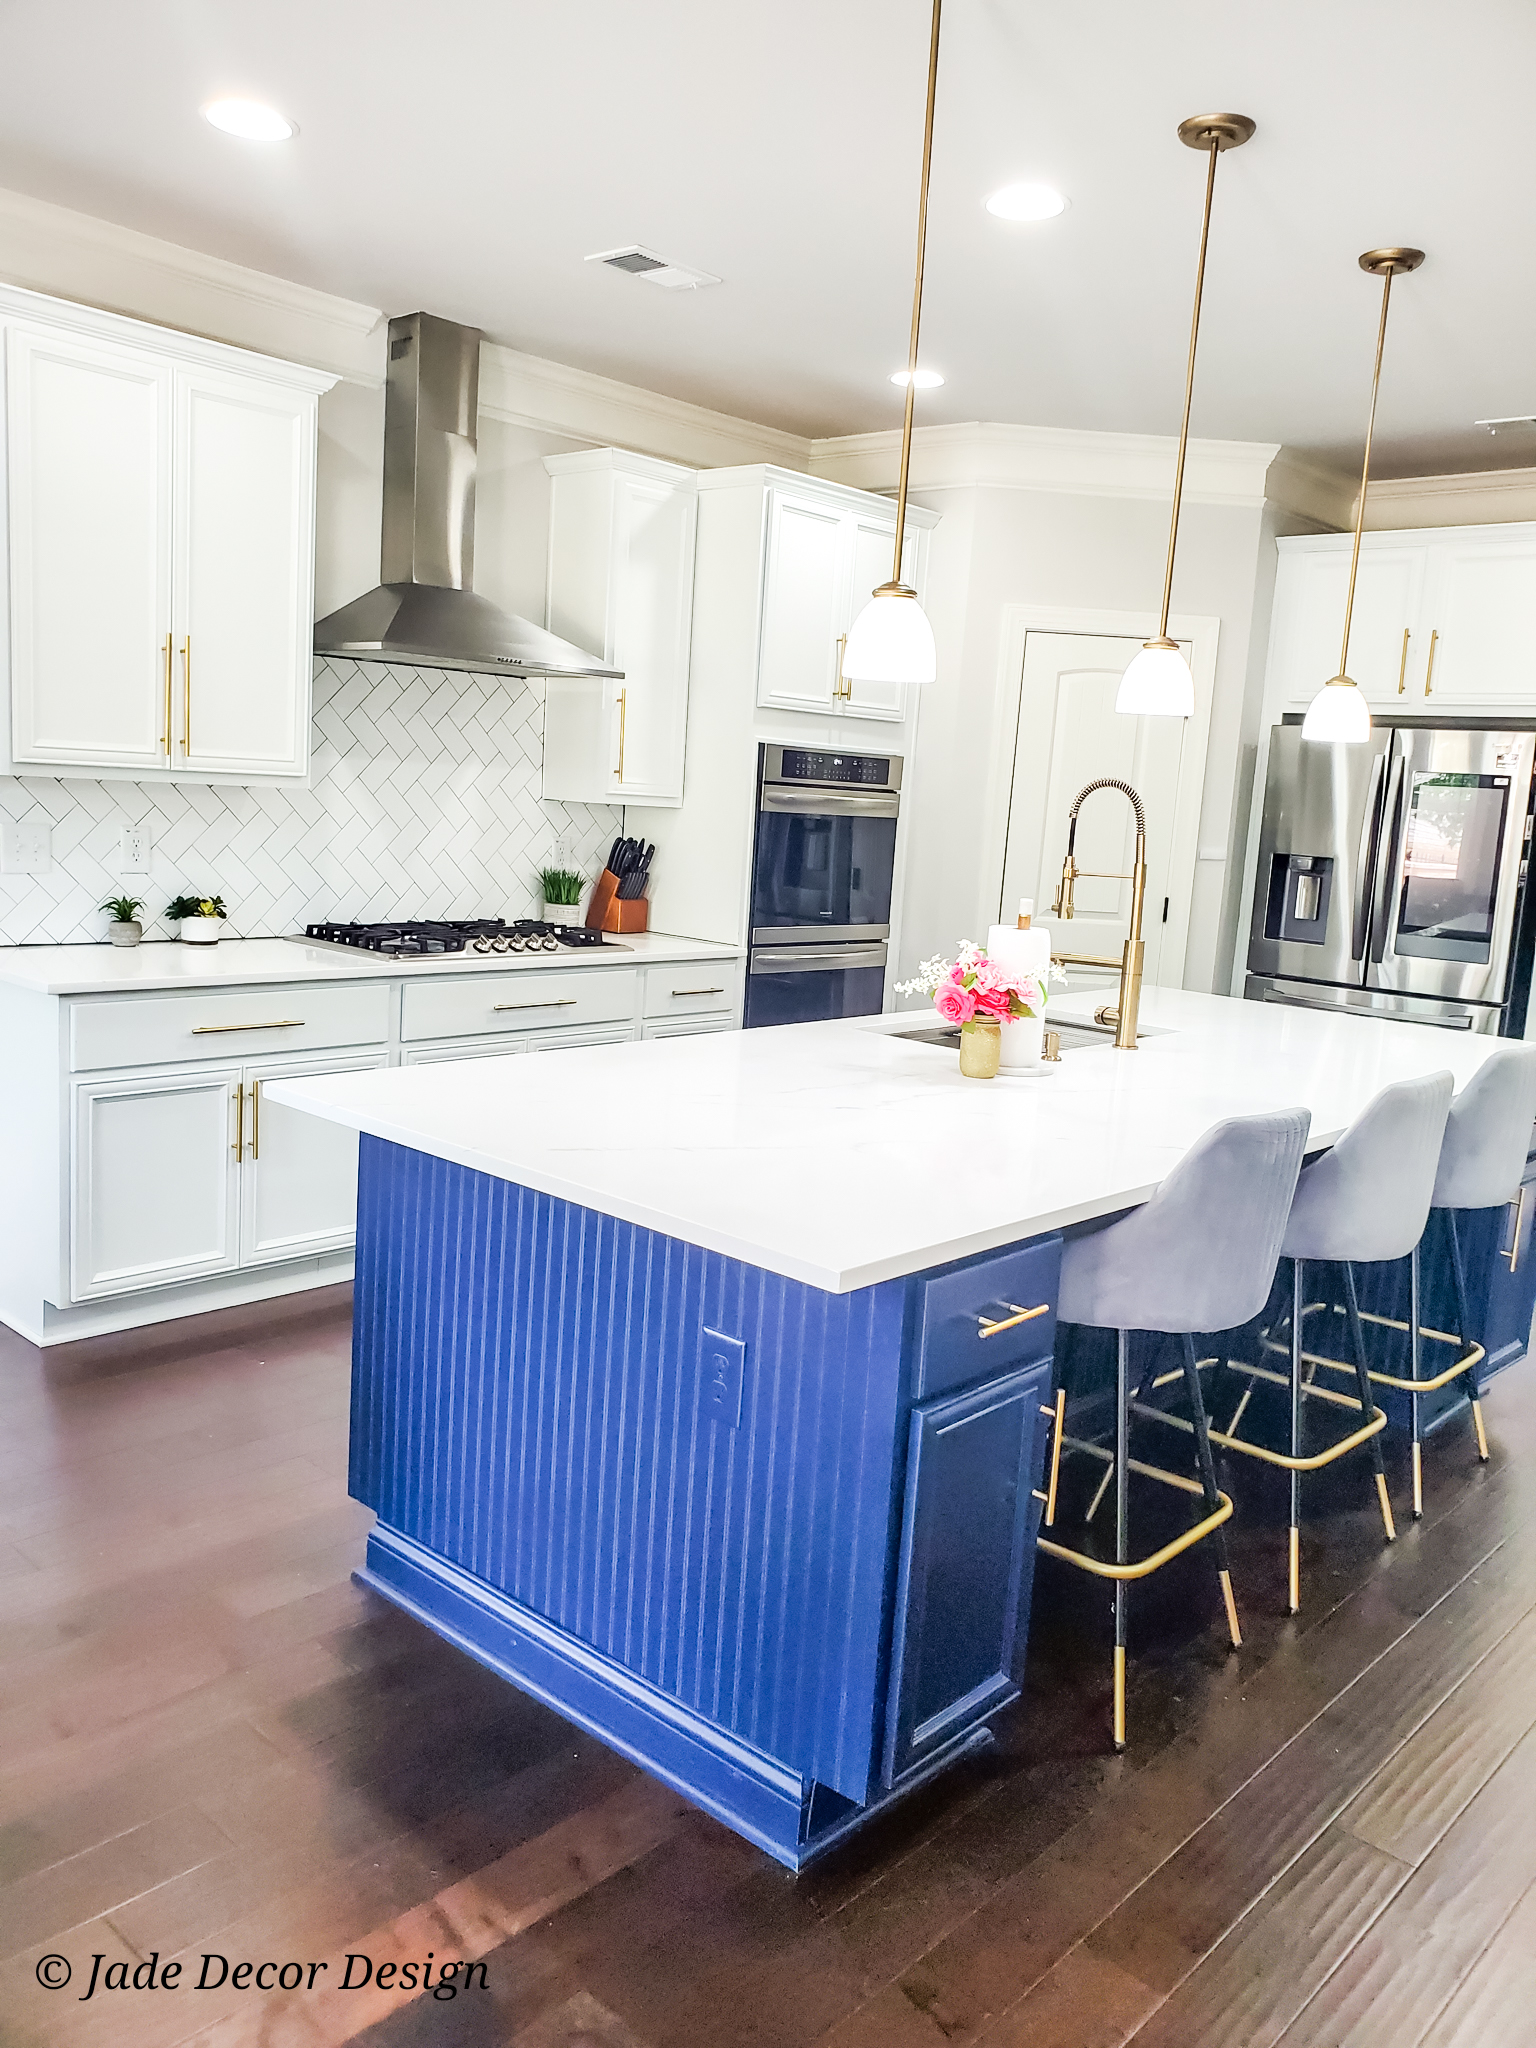
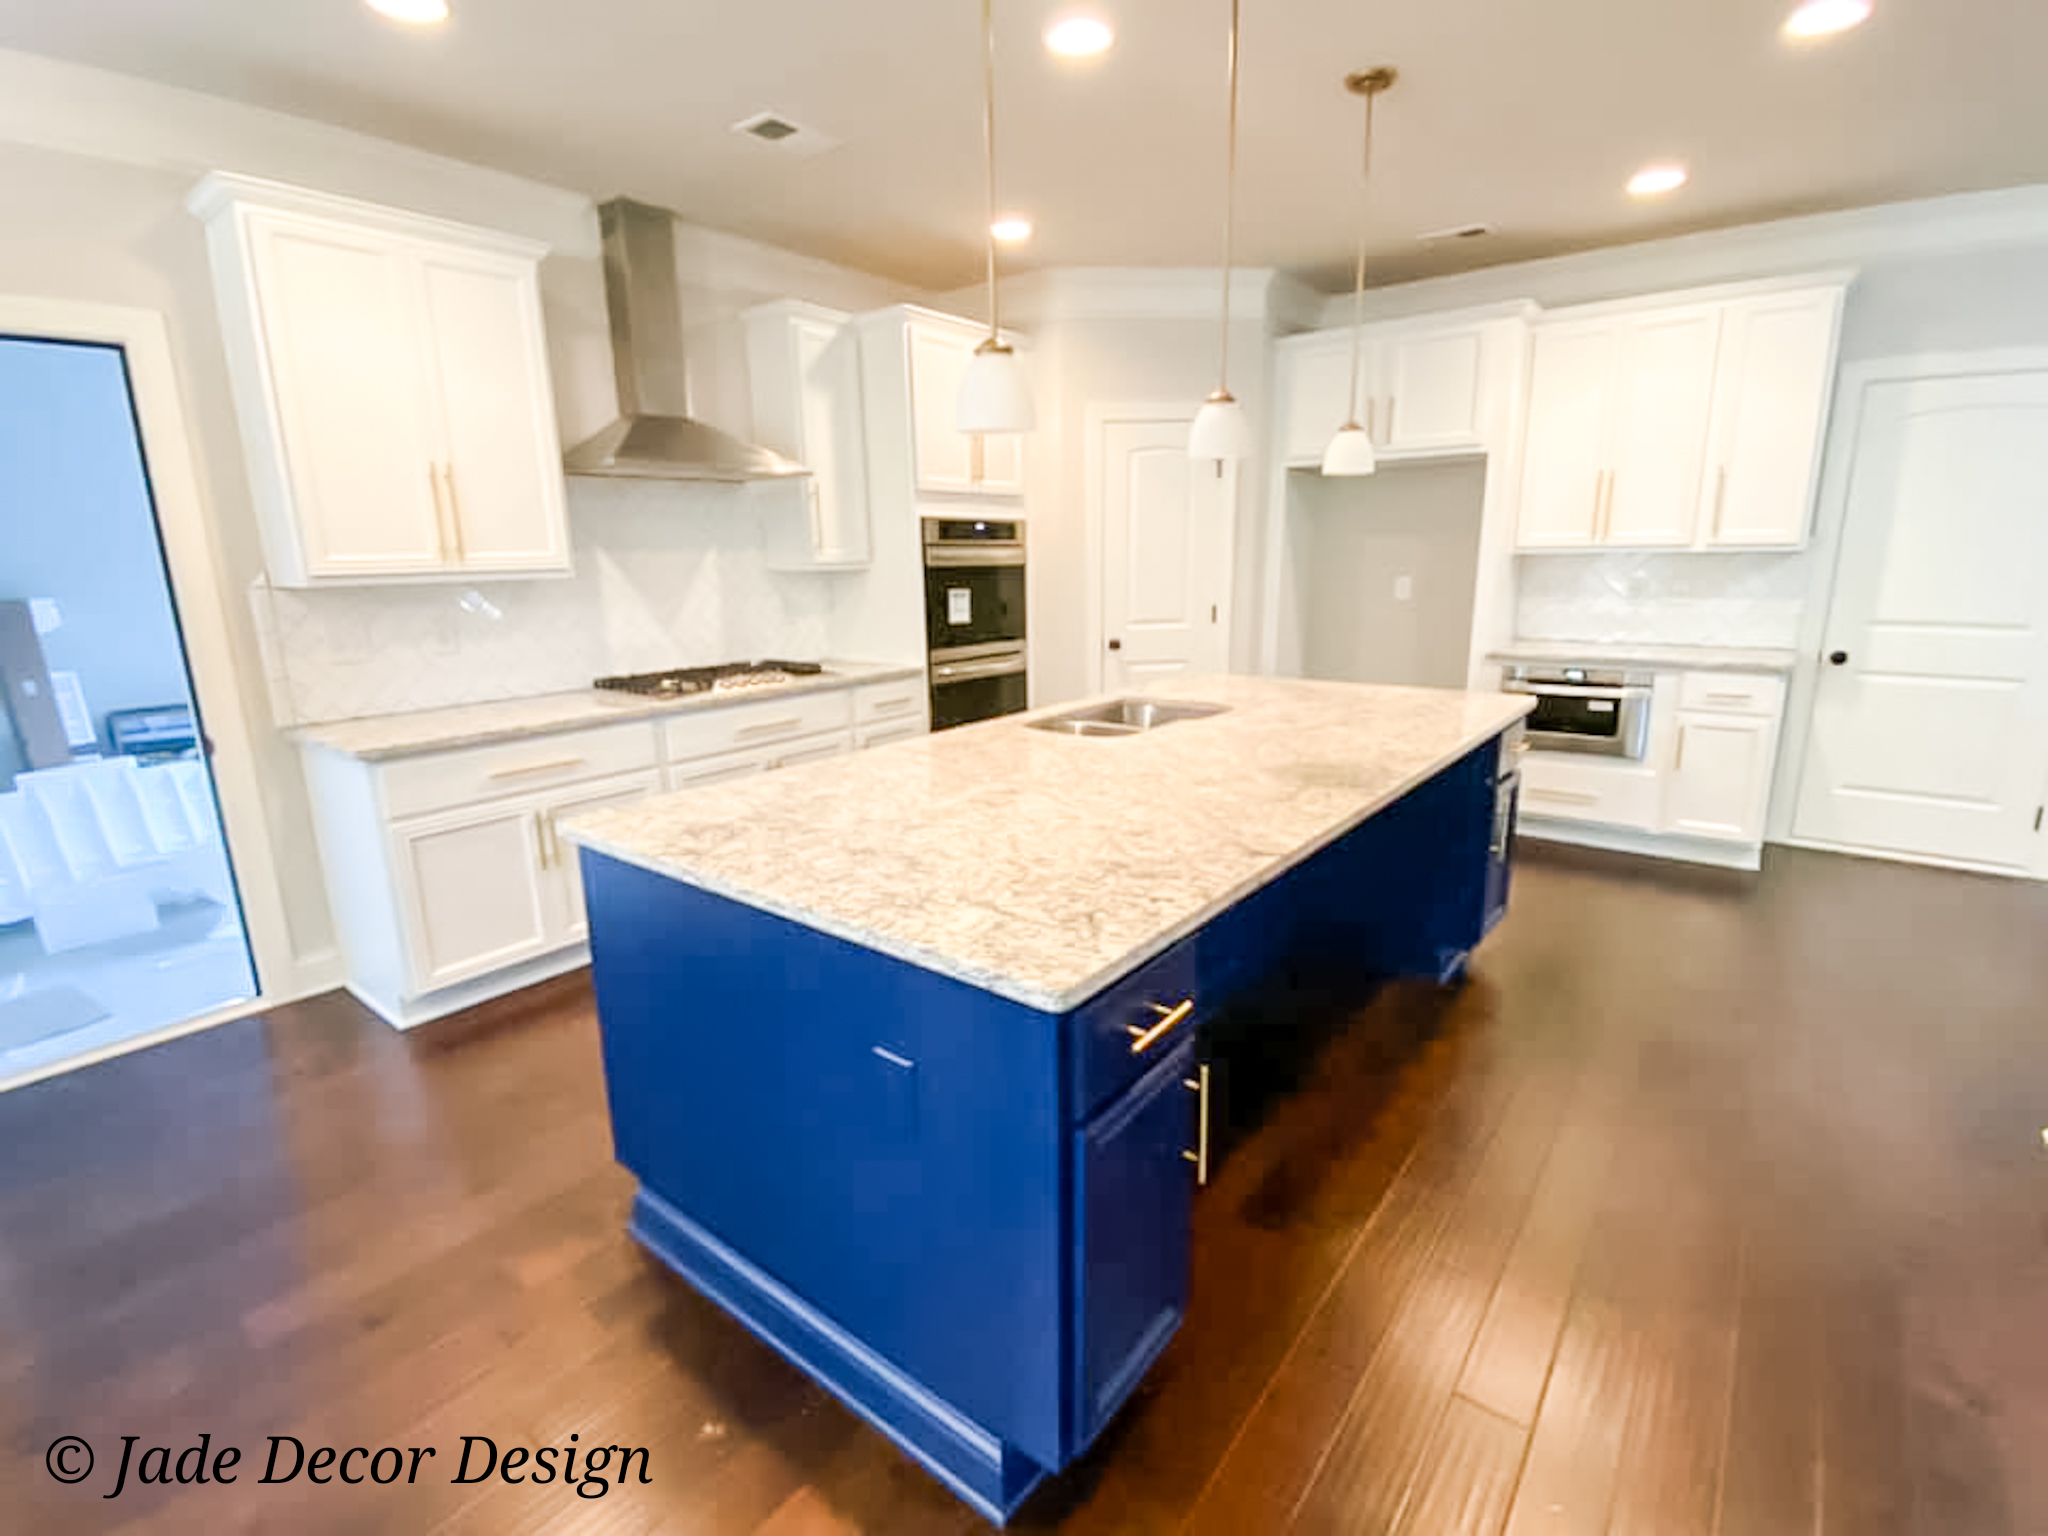
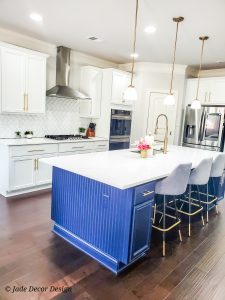
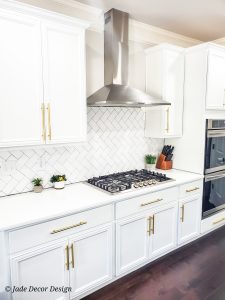
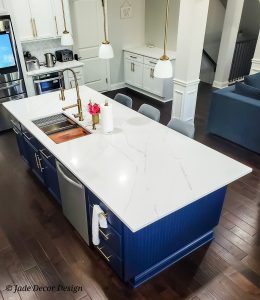
I have always wanted an all white kitchen. I love how light and bright it makes the space but I wanted a pop of color. I decided to paint the kitchen cabinets (uppers and lowers) in white and make the island a feature piece in a rich blue color. I added brass hardware and finishes for that extra glam look I love.
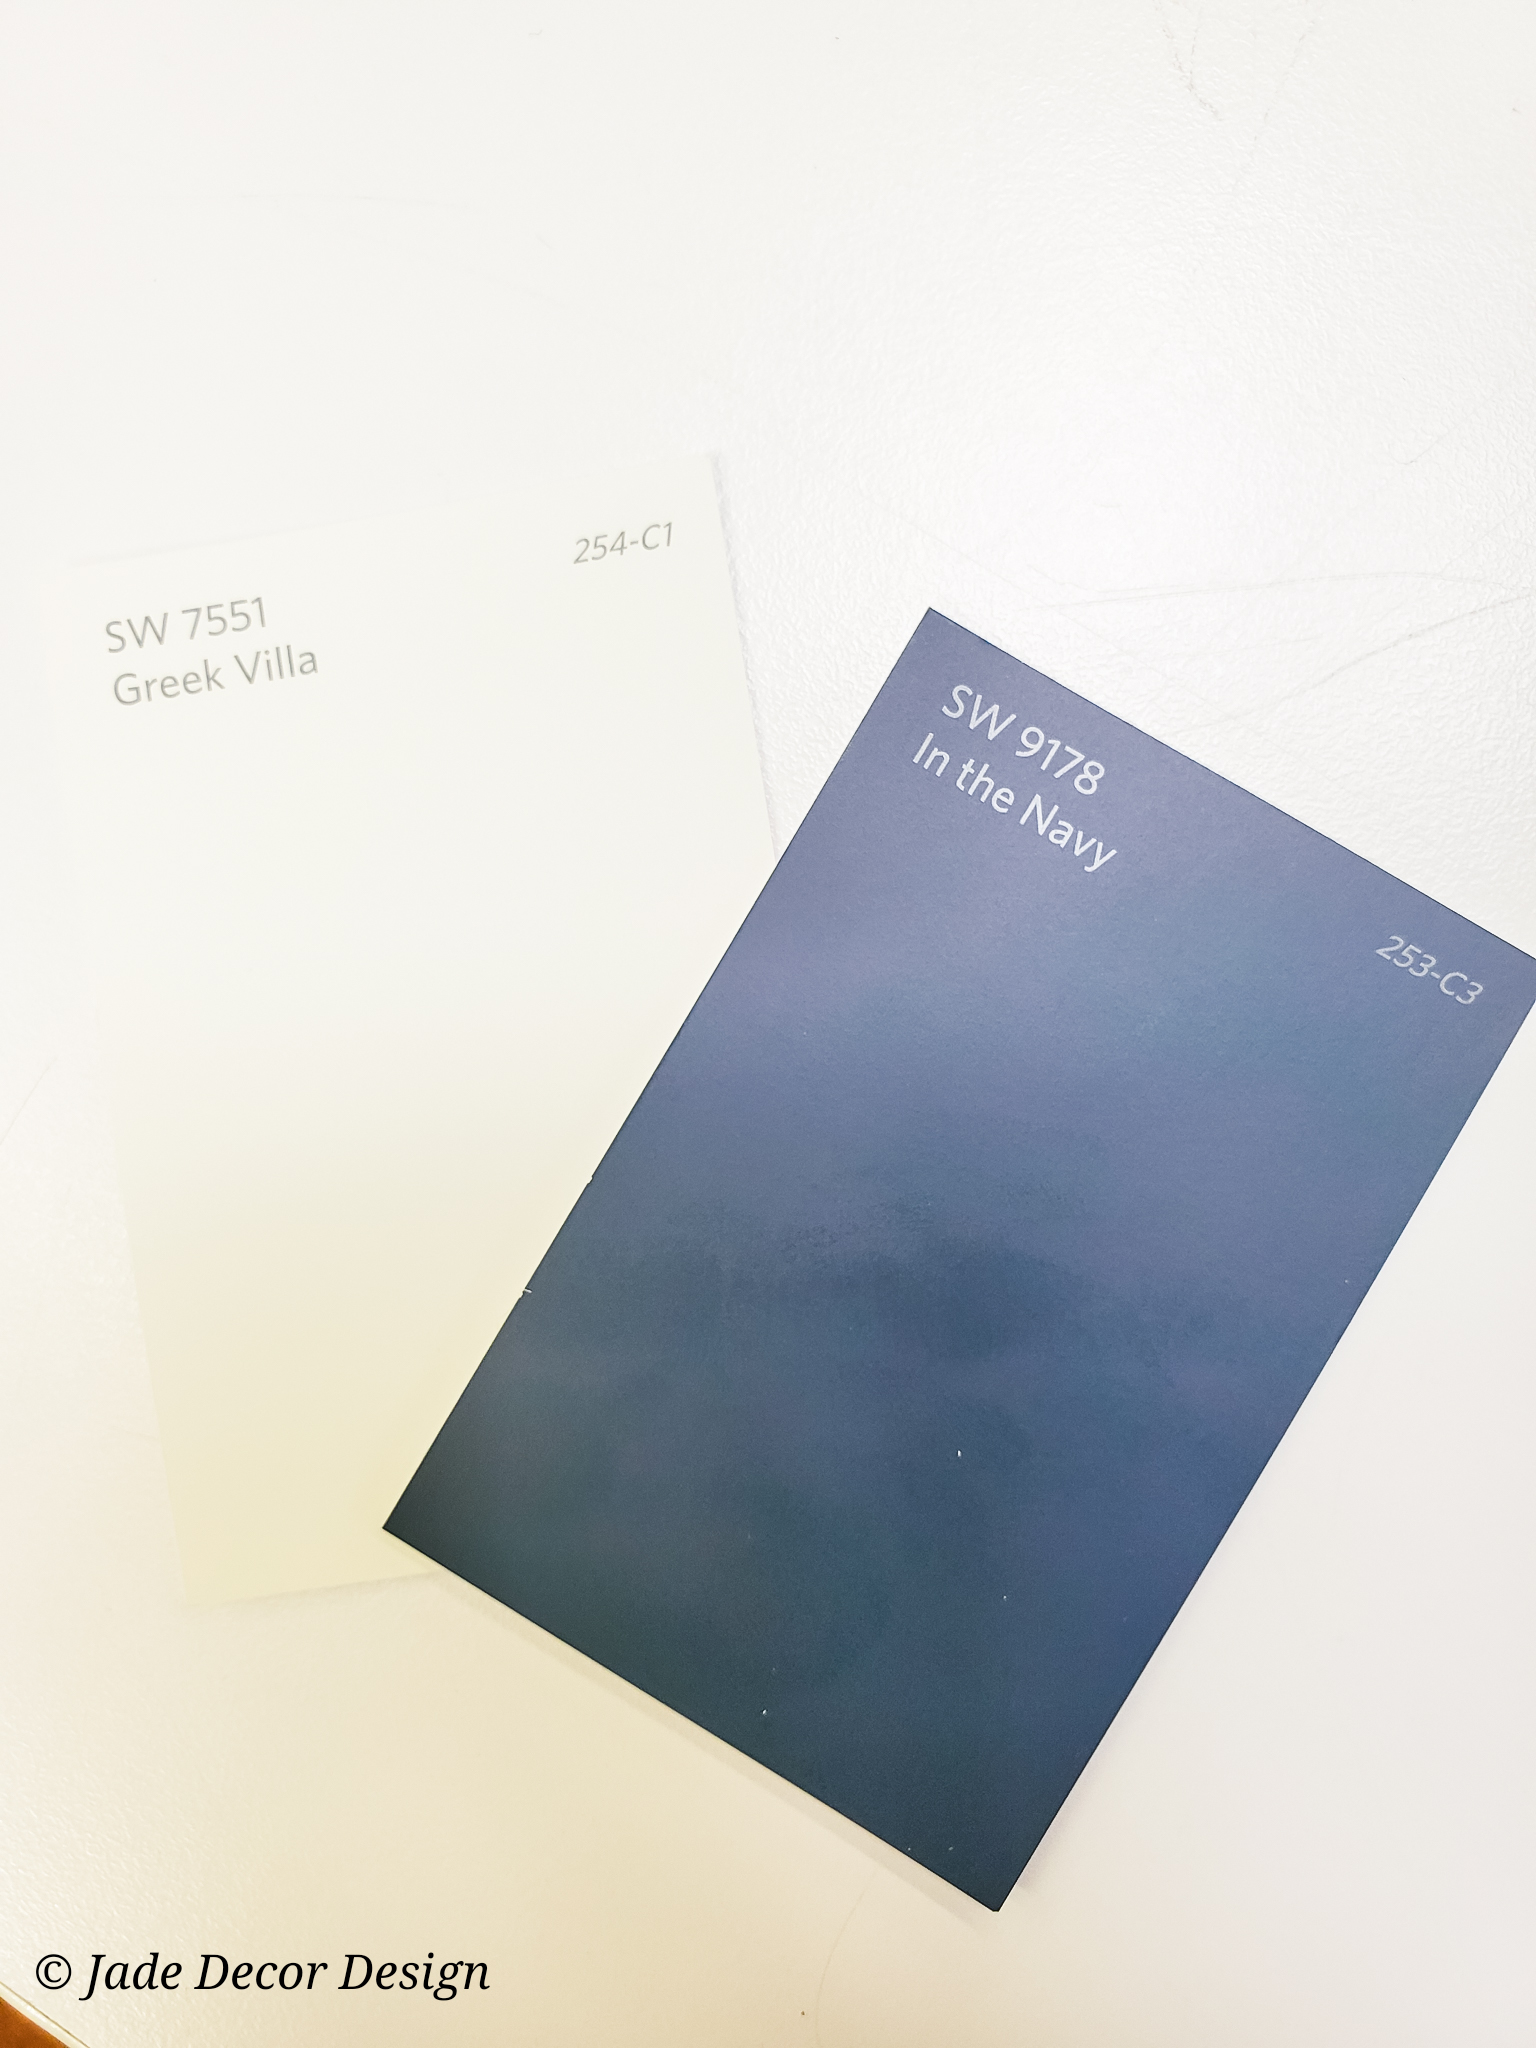
I wanted a warm white for the kitchen so I went with Sherwin Williams “Greek Vanilla” (SW 7551). I also decided on a rich blue color for the island so I selected Sherwin Williams “In the Navy” (SW 9178).
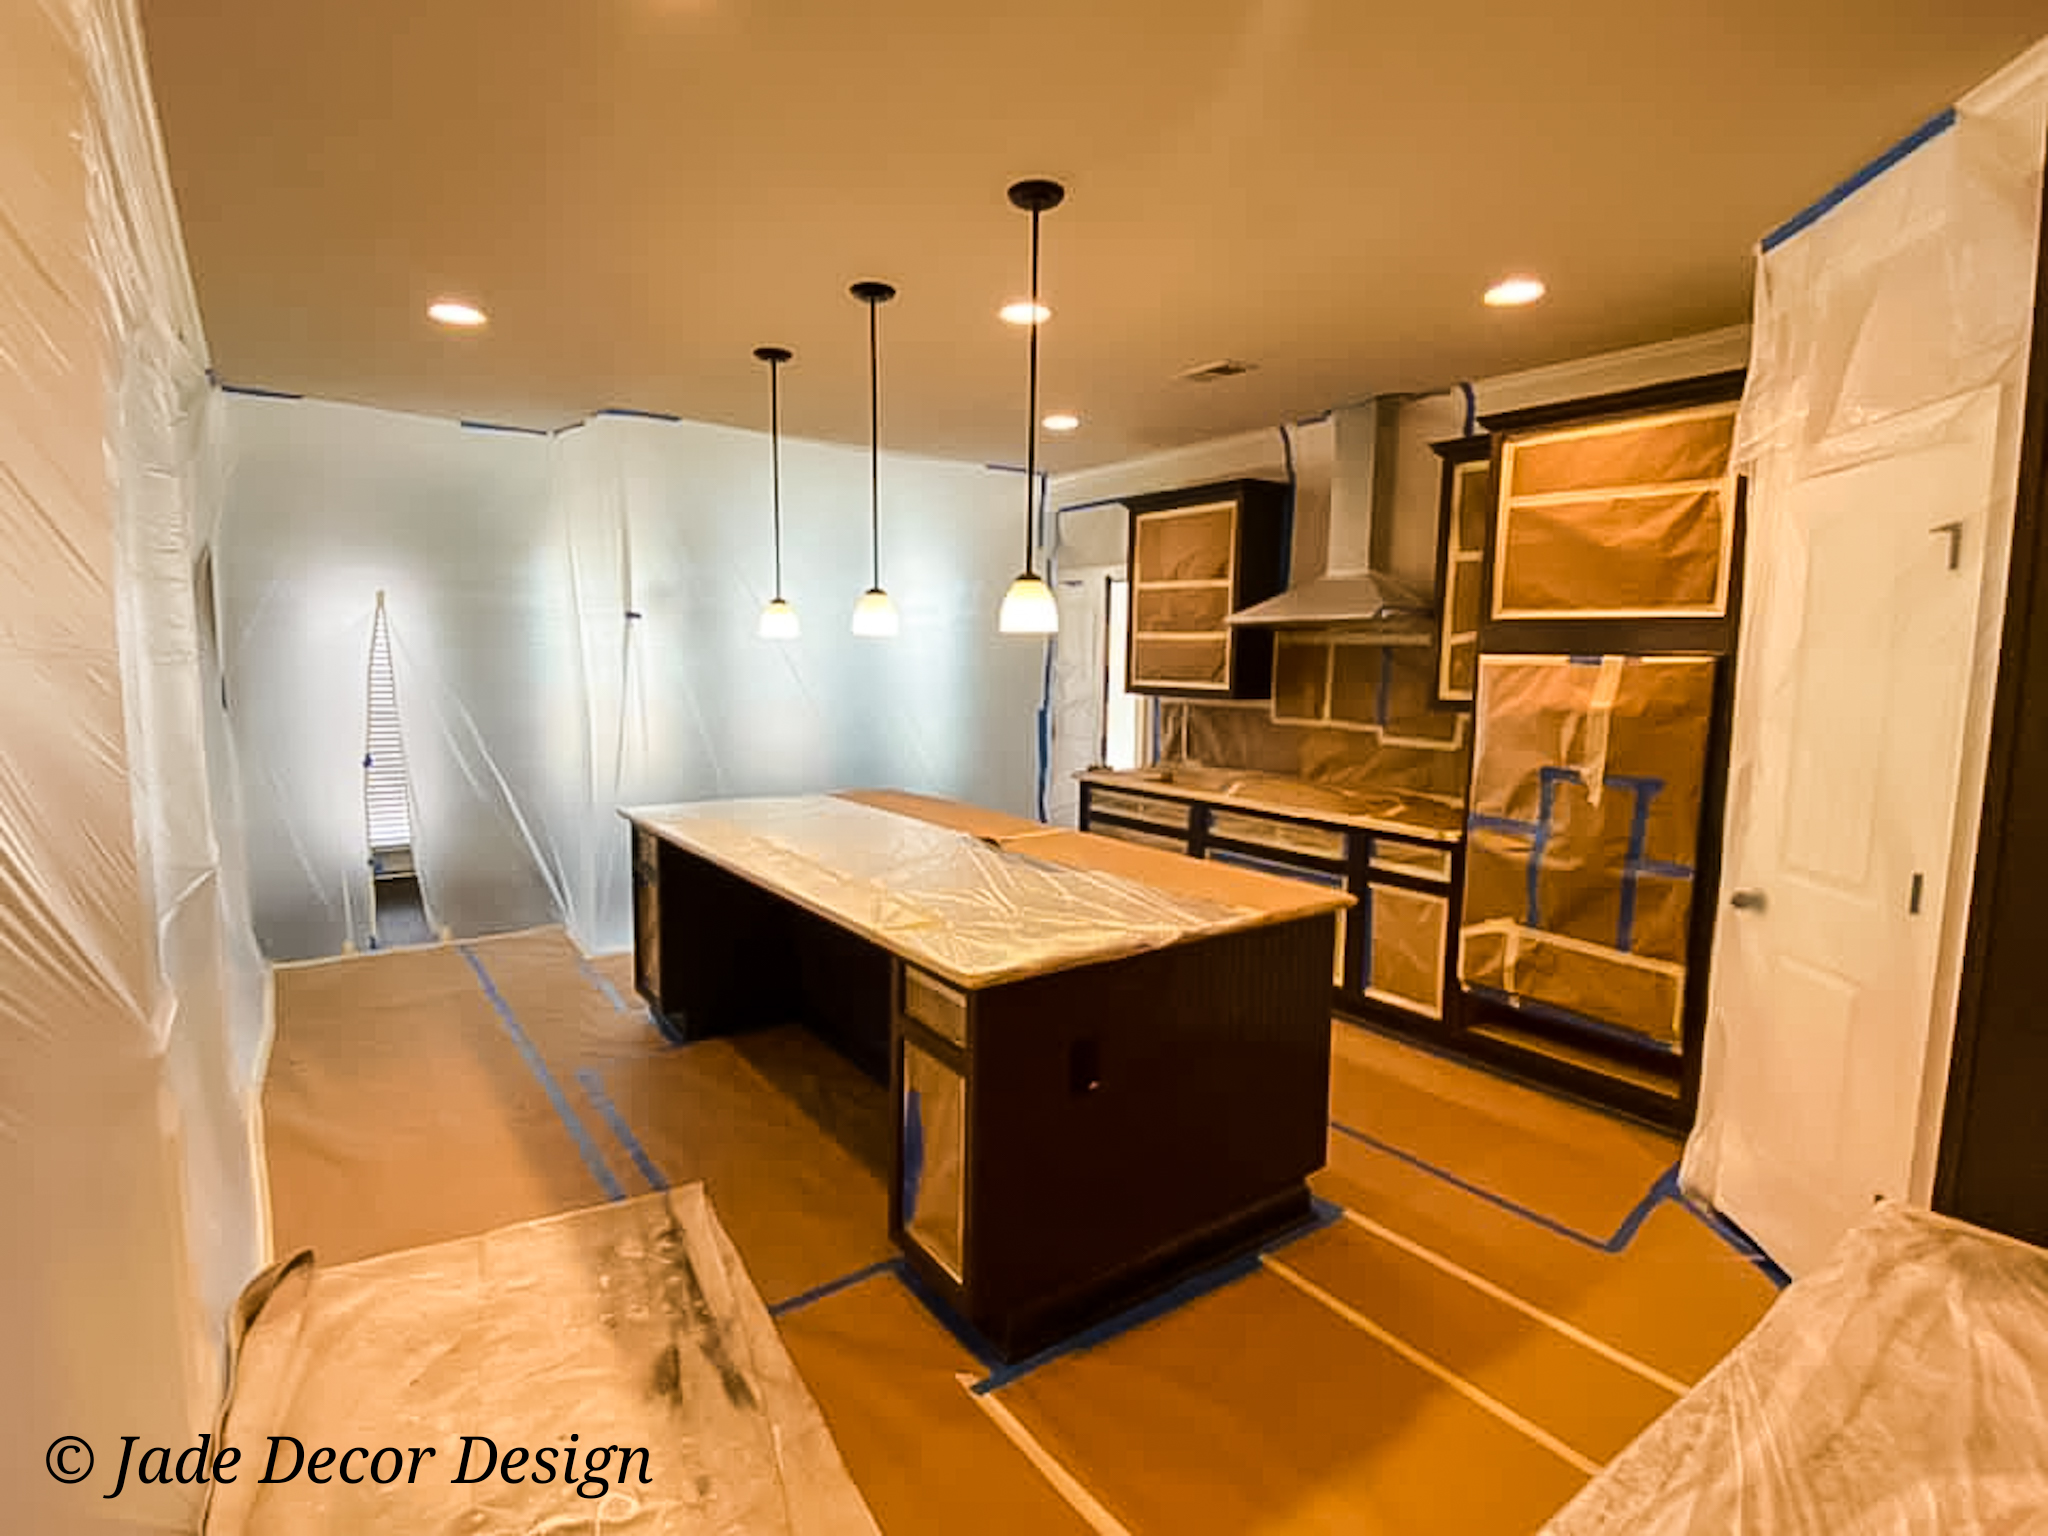
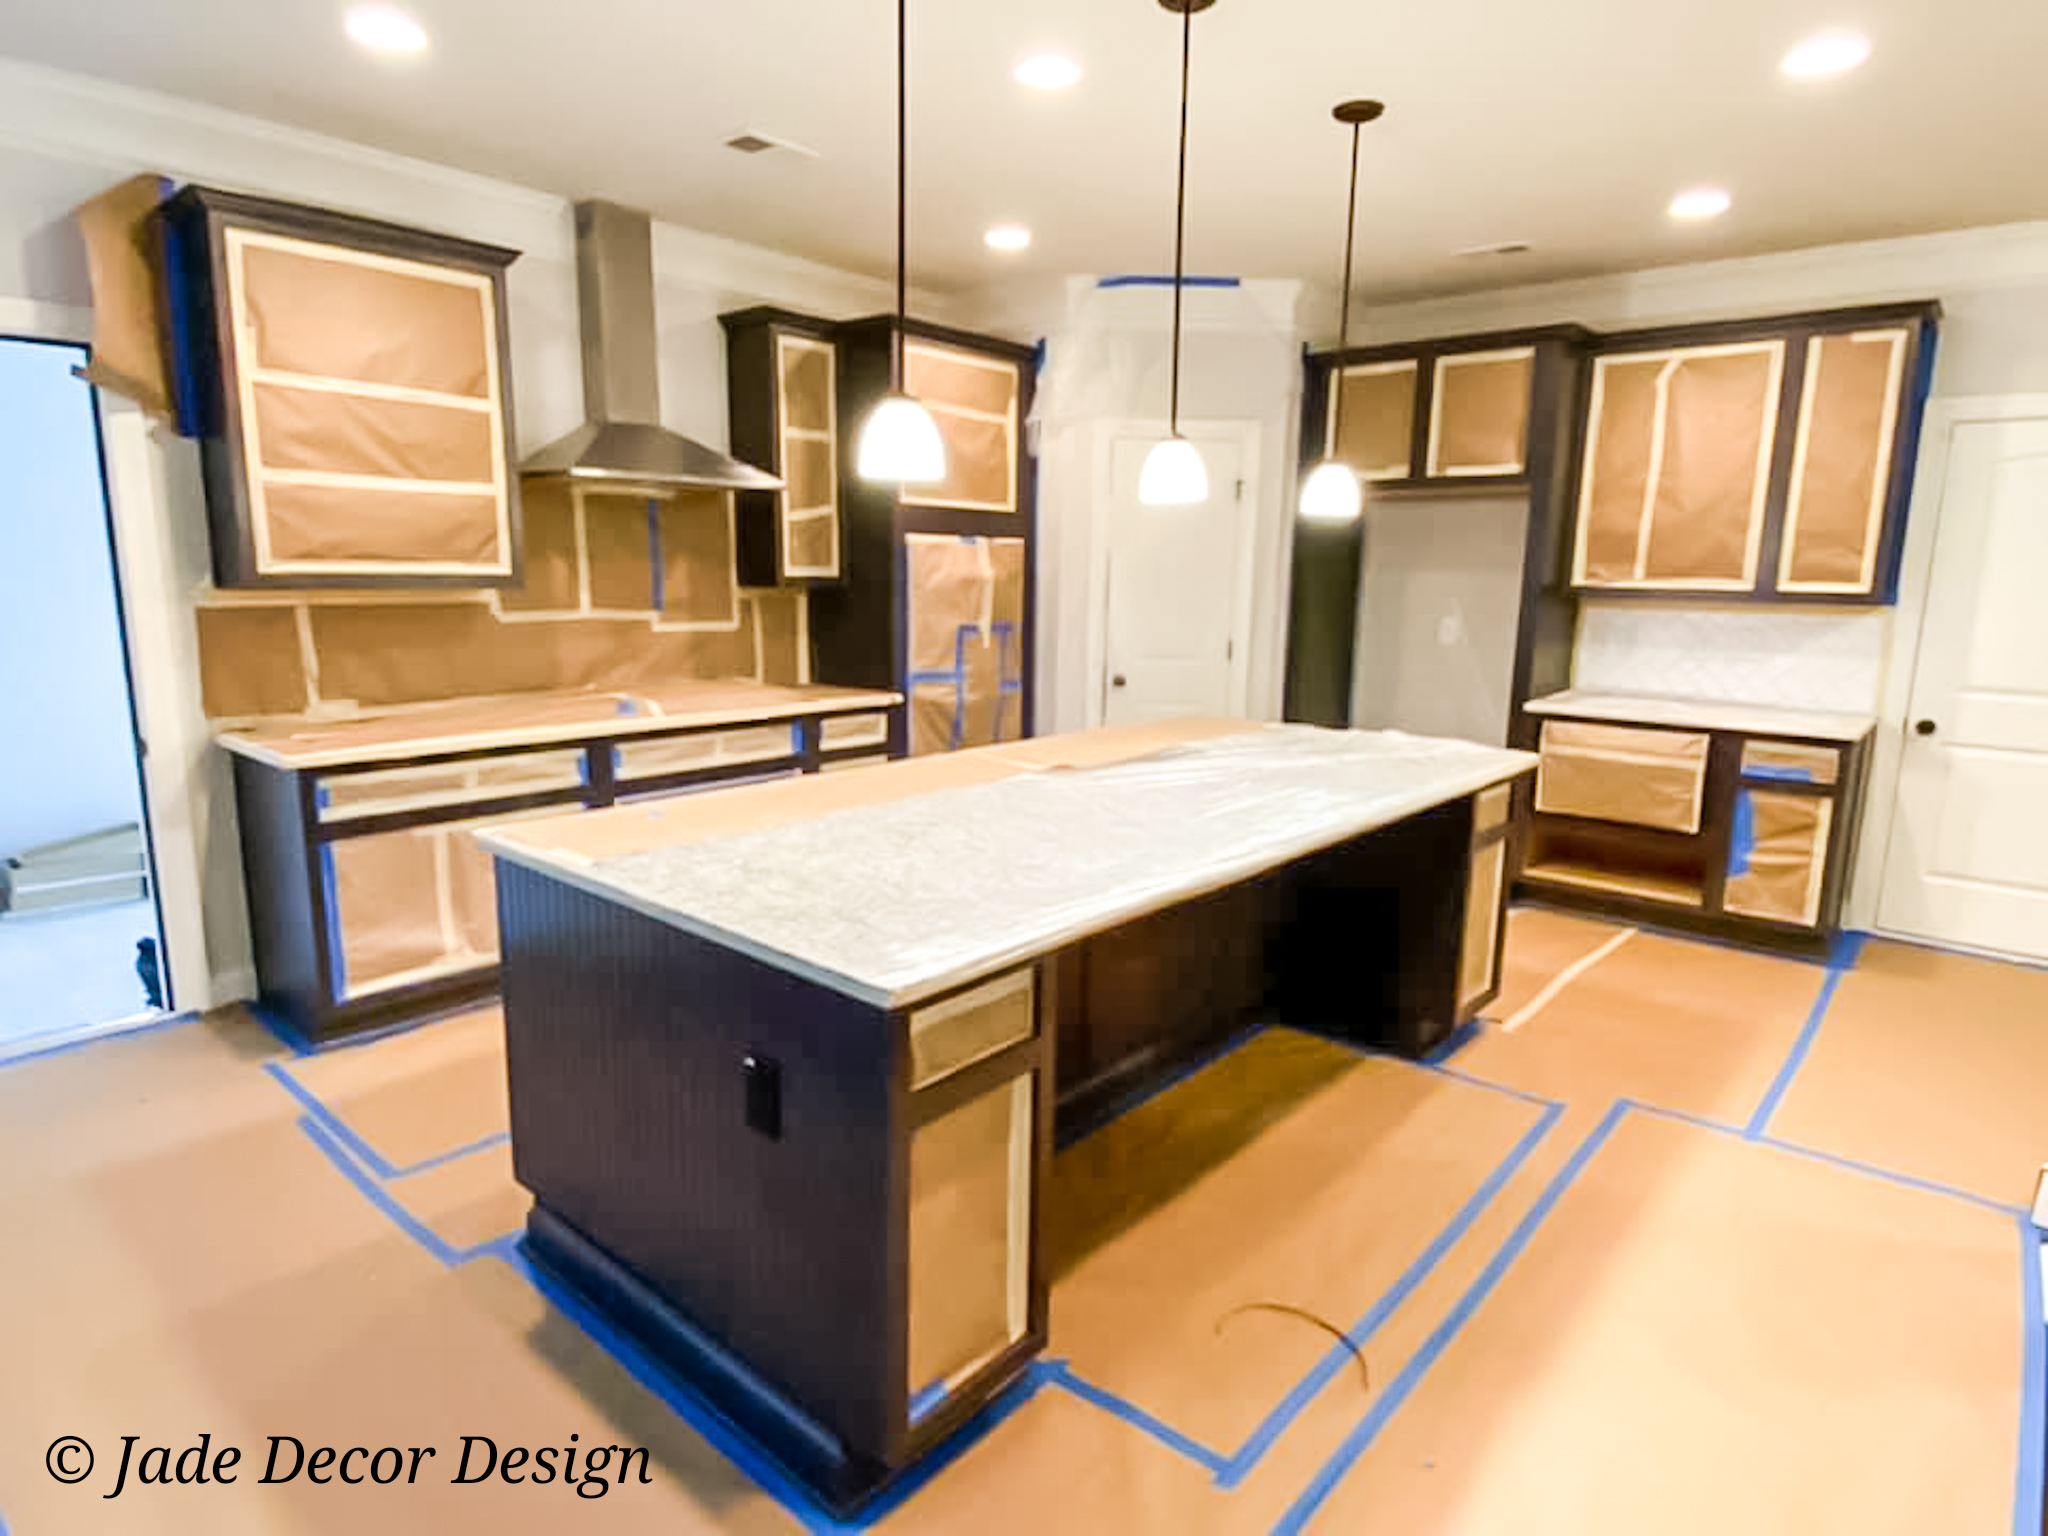
Before finding a paint vendor, I did a lot of research on lacquer vs enamel to narrow down the paint finish I would be going for. I ended up going with the lacquer finish because it lasts longer and has a more seamless finish. The only drawback was that there is a lot of fumes emitted during the paint process. However my painter sealed off the kitchen during the paint process and they had an air vent that released the toxic fumes outside.
Cabinet Pulls and Finishing
I wanted a touch of glam so I went with brass finishes. I decided to use pulls over knobs because of the overall aesthetic look. I found really great hardware pulls by GlideRite Hardware on Wayfair and got them in different sizes depending on the height of the cabinet.
The house came with bronze finishes so the pendant lights above the kitchen island had a bronze finish which stuck out since everything else was in brass. So I had the cabinet painter spray paint the metal part of the pendant light in a brass color that matched the hardware using a paint from Rust Oleum in “Metallic Champagne Bronze“. I have plans to change out the lights in the future but for now, it works in the space.
COUNTERTOPS
Countertop: Types and Styles
Since the house was brand new, the granite in the kitchen countertop was in great condition and I didn’t want to throw it away or have it destroyed. I figured I could use it to remodel a different area in the house like the basement bar or the kitchen in my old house. So it was important to find a company who would do a tear out and re cut of my existing stone. The company I found was going to tear out the existing stone and save it in order to re-cut for future projects, then they will install the new granite stone.
I decided to go with Quartz for its durability and low maintenance. I went with an MSI quartz stone in “Calacatta Ultra“. I loved the beautiful veining that made it look almost like marble. After selecting my stone, the next step was measuring the kitchen countertops so a template can be created on the stone. Our original kitchen island was 9ft by 4ft but I wanted a larger island so during the measurement, I asked that it be increased to 10ft by 4.5ft.
We had scheduled the cabinet painting and stone installation to be started on the same day but we ended up having to paint the cabinet first due to scheduling issues then remove and install the new stone after. In hindsight, the stone should have been removed and installed first to avoid scratches on the newly painted cabinets. The installers were careful and were able to finish the installation with very minimal chips to the paint.

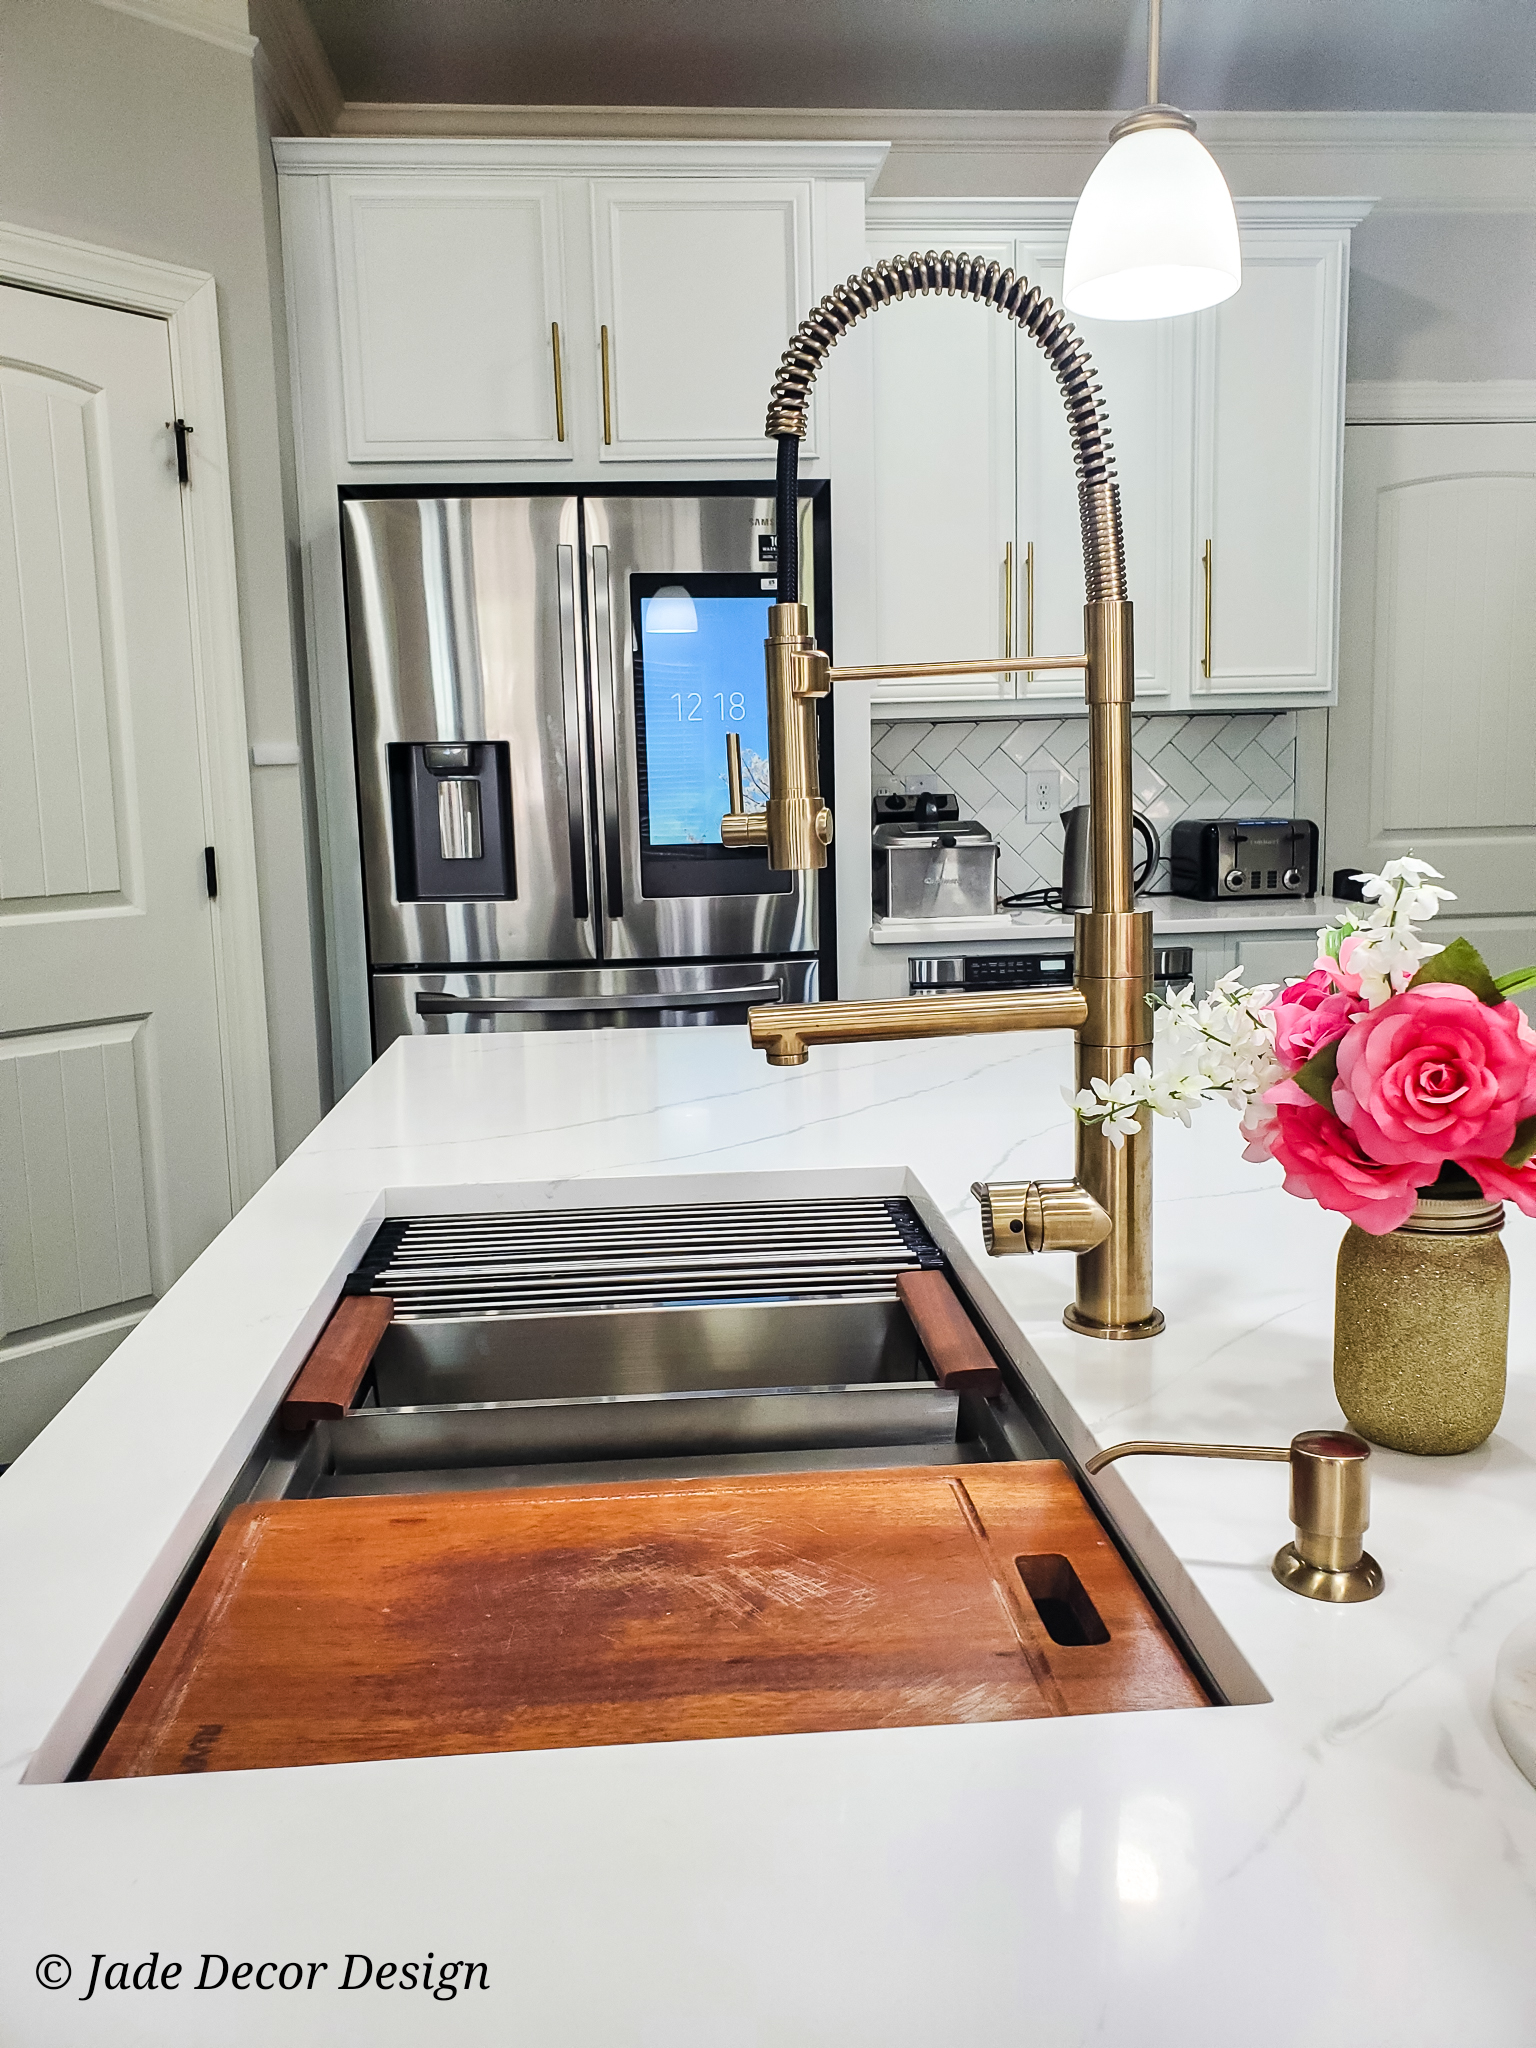
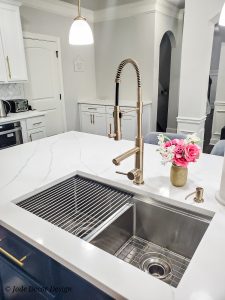
Sink, Faucet and Soap Dispenser
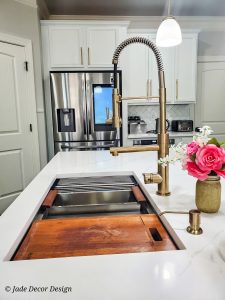
I also decided to change out the existing sink and faucet to something that would fit my style. I wanted a large and deep sink and I was initially going to go for an undermount cast iron sink but I found this workstation sink by Ruvati on Wayfair and it was all I ever dreamed of in a sink! I got the 33″ L x 19″ W Double Basin Undermount sink since the cabinet for the existing sink was 36inches wide. The sink comes with a Basin Rack/Bottom Grid, Colander, Basket Strainer and Cutting Board and I use these items daily in my kitchen.
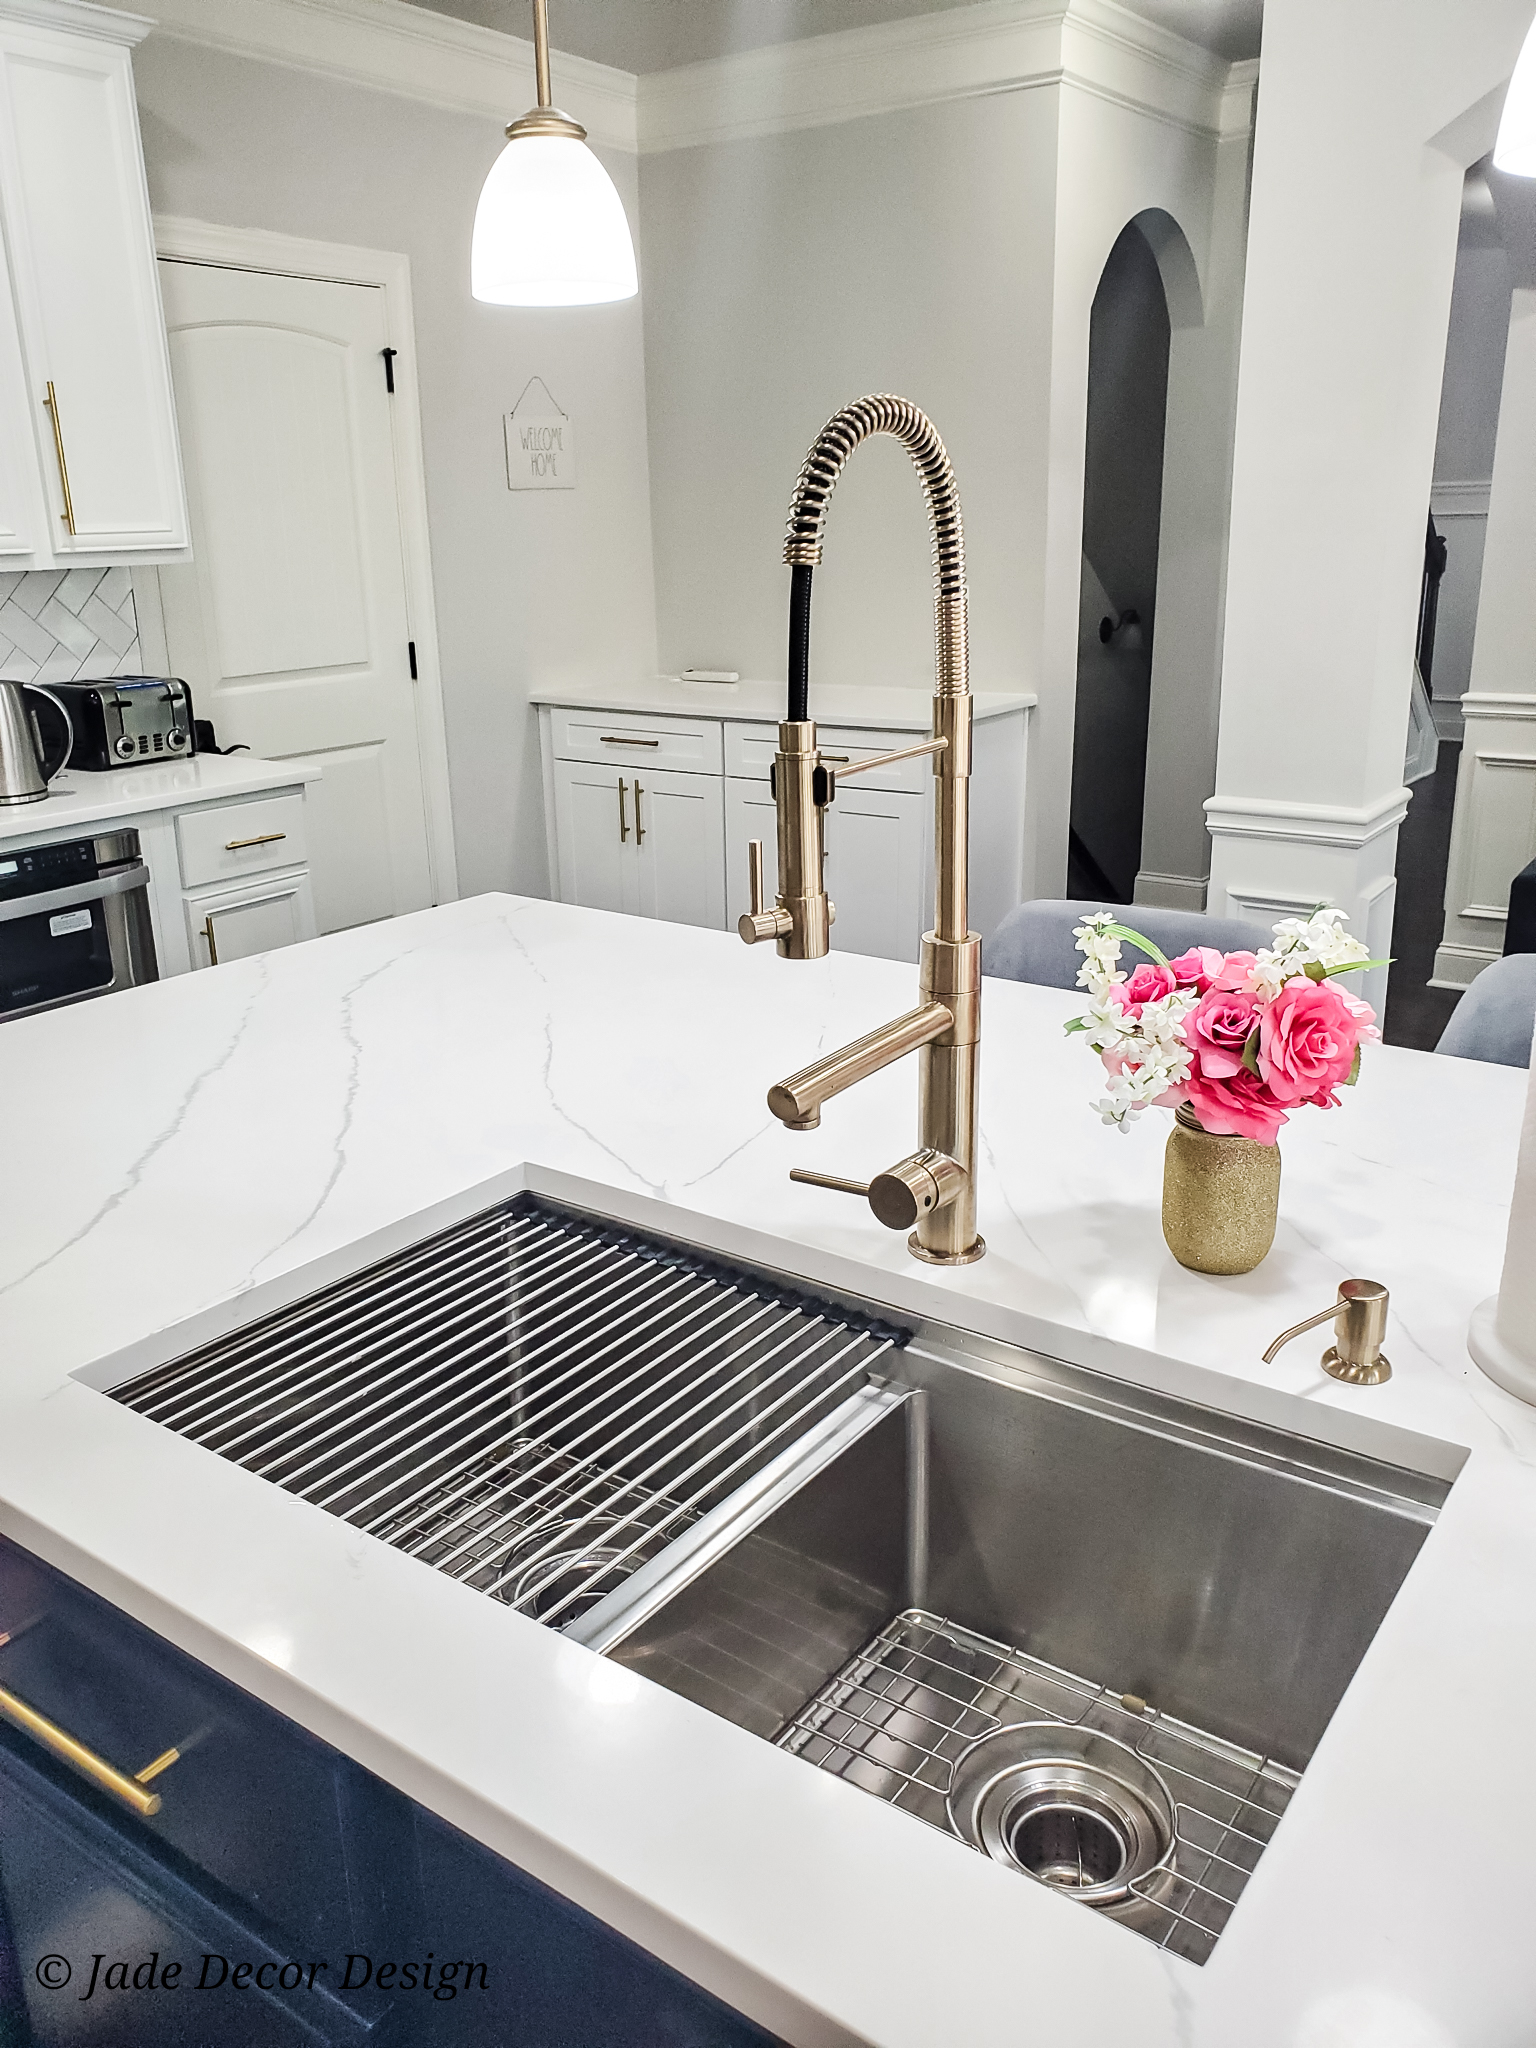
I wanted a statement faucet so when I found the Artec Pro 2 function faucet by Kraus, it was a no brainer. I scoured the internet to find it in brass but it kept going out of stock and was only available in black and nickle. I finally found it on Build and bought it immediately.
Since my sink was in my island, I didn’t want to have dish washing soap displayed on my beautiful island. So I decided to also have a soap dispenser installed. I found a nice brass deck mounted soap dispenser by Kraus as well to match the faucet.
OTHER FEATURES
Backsplash
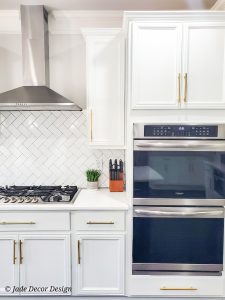
Another feature in the kitchen is the beautiful herringbone backsplash. I knew tiling was going to be difficult to replace so I had to get it right. Our builder had very limited options of tiles with just white, grey or beige subway tiles. Since I was going for an all white kitchen I decided to do the white subway tile but upgrade the style to a herringbone pattern and dark grout to add some interest to it. I’m really happy with the turnout.


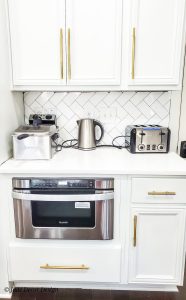
Appliances
During the build process we indicated that we wanted our microwave installed in the upper cabinet but the builders ended up putting it in the lower cabinet. Due to this mix up, we realized it would be really difficult to use the traditional microwave that would require us to bend down a lot to put the food in and access the microwave controls. We ended up having to do a last minute upgrade to get a microwave drawer for ease of use. This was honestly the best decision and we love this microwave a lot.

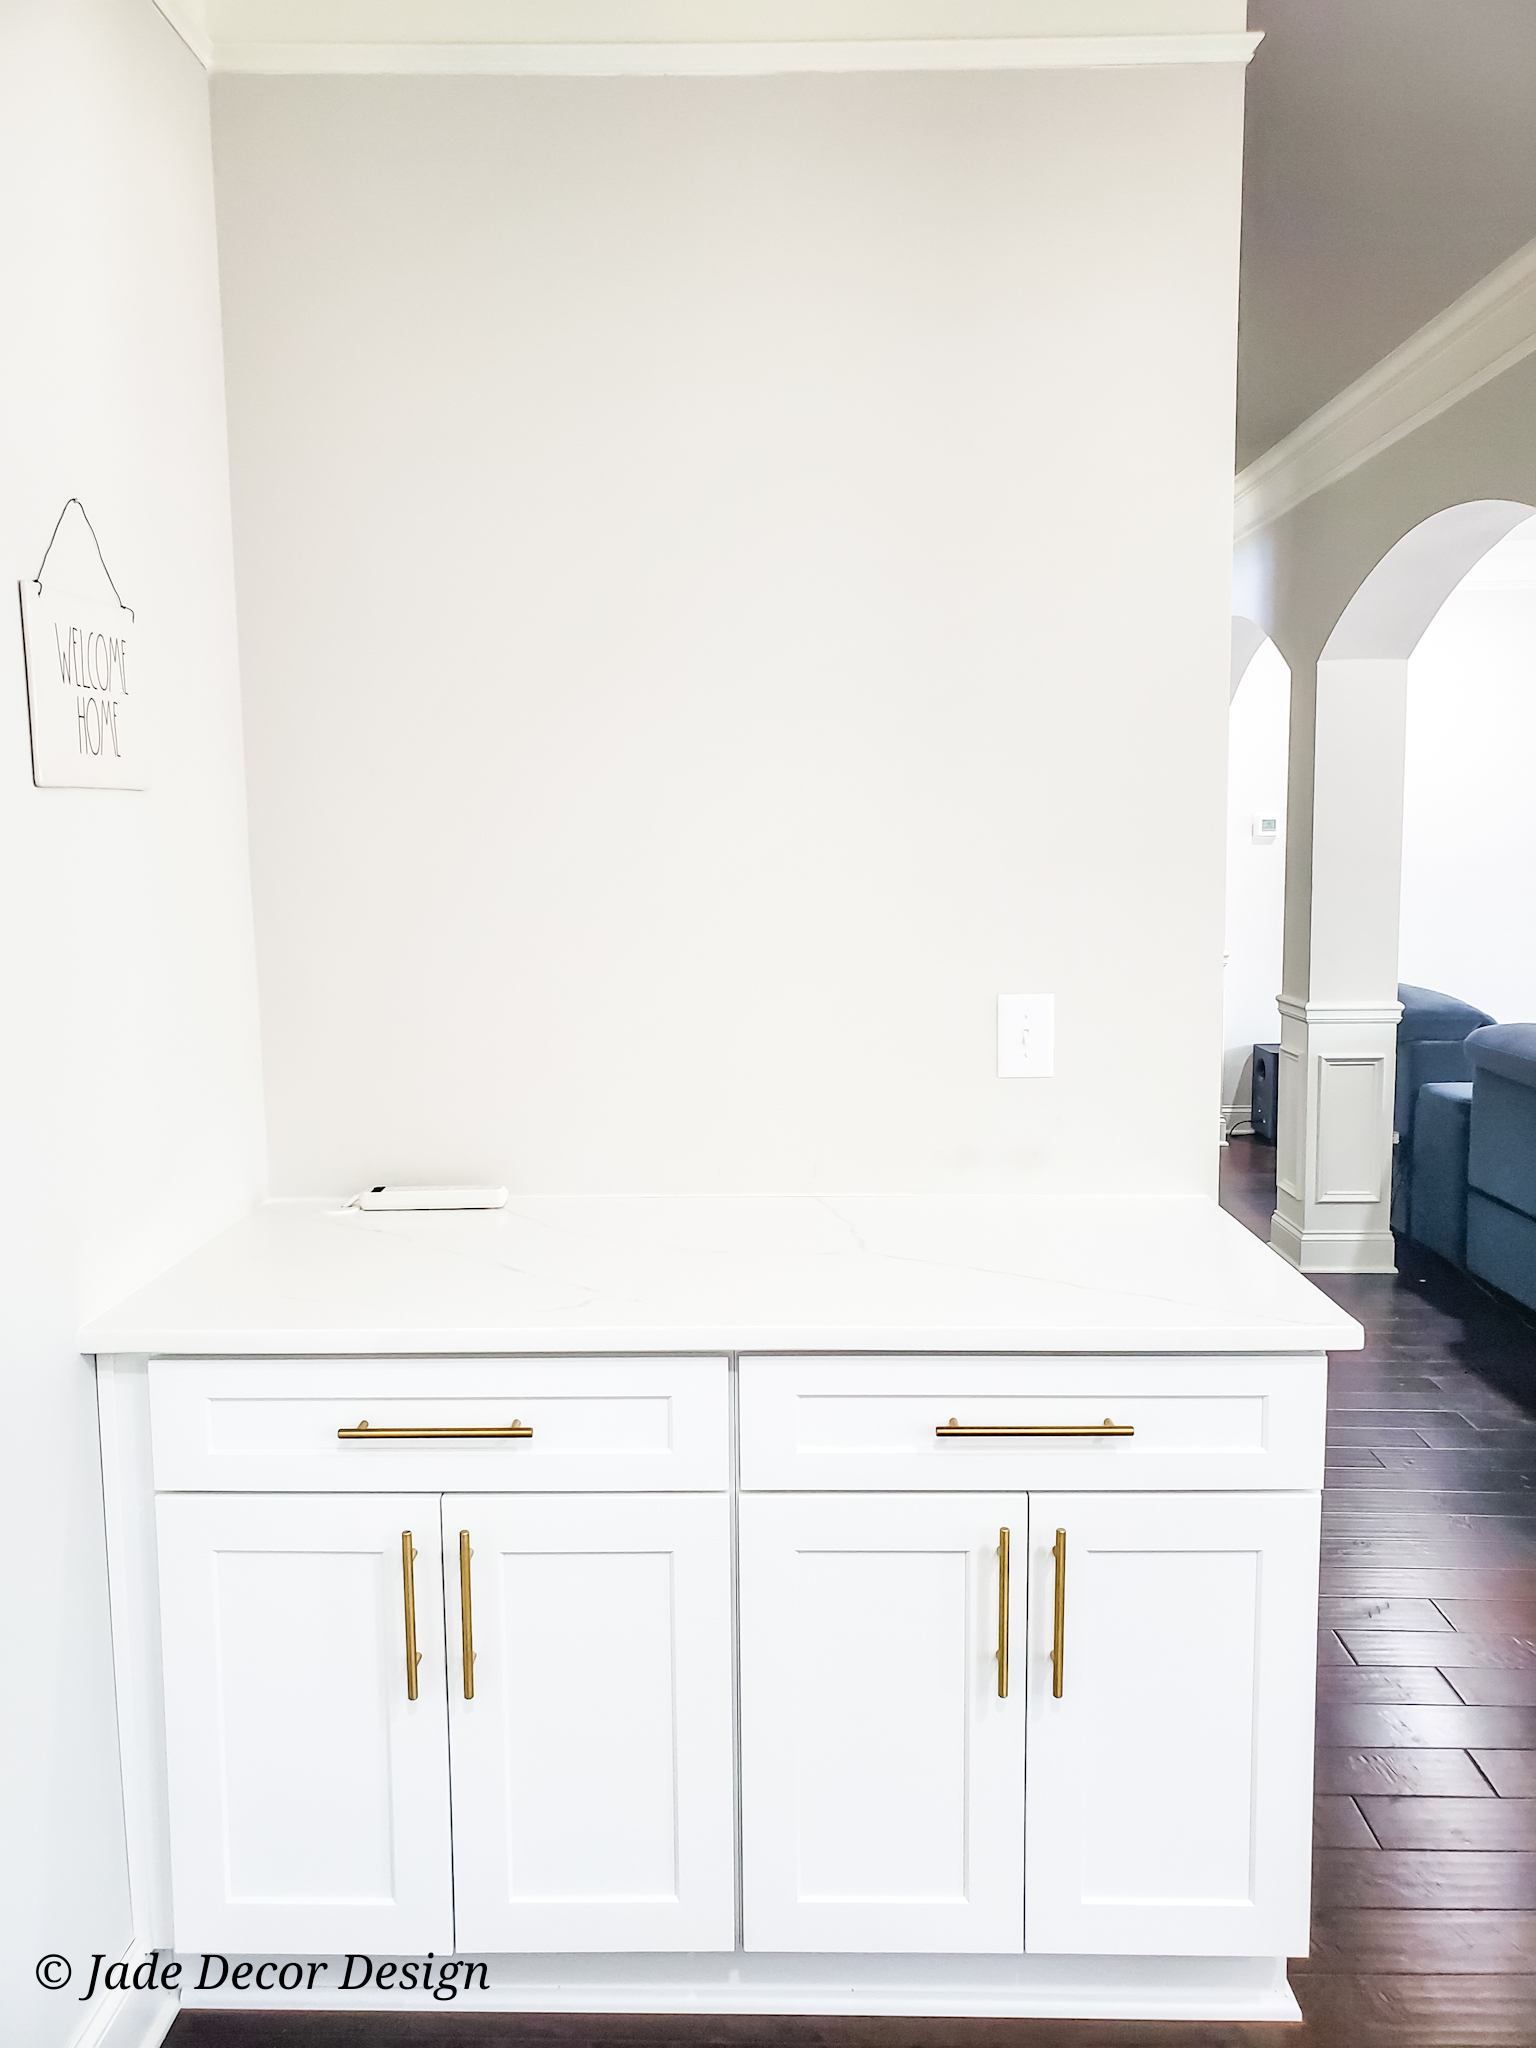
Drop Zone
Our floor plan had a mudroom area in the kitchen just off the garage door. I didn’t like the idea of having a mudroom in the kitchen so I decided to have cabinets installed there instead for more storage and counter top space. The cost to add new cabinets by the builders was ridiculously high so I sourced a different vendor to have this installed after closing. I ended up installing only lower cabinets in this space. Since this space wasn’t meant to have cabinets originally, the electrical sockets were added to the bottom close to the floor, However after installing the cabinets this blocked off the electrical sockets. I wanted to have access to electricity in that part of the kitchen so had the cabinet installers cut a hole in the back to expose the electrical outlet and then the stone installers cut a hole in the counter top so we could pass an extension cord through to access. This was such a great idea that makes that space more functional. I ultimately plan to add open shelving above the cabinets for extra storage and for display!
FINAL THOUGHTS
I am extremely happy that I tackled this kitchen progress immediately we closed on the house and before we moved in. I am extremely pleased with the way it turned out! One thing that helped me succeed was planning ahead of time and doing a lot of research. I ended up working with really good vendors for this project and I am very happy with the result.
I love this space because it gives me a great foundation to continue to build up on. I plan to make several cosmetic changes as time goes on like switching out the light fixtures, adding under cabinet lighting, updating the back splash or even changing the cabinet colors. In the meantime, I look forward to styling this space and sharing my ideas and new finds with you all.
Thank you for spending this time with my musings. Feel free to reach out if you have any questions. I’ll see you in my next post!
JDD


Your kitchen is absolutely stunning! Thanks for sharing all the intricate details of your kitchen transformation. I’m inspired!
Your kitchen is absolutely stunning! Thanks for sharing all the intricate details of your kitchen transformation. I’m inspired!
This is simply beautiful! I didn’t know so much detail went into this! Great Job!!!
This is simply beautiful! I didn’t know so much detail went into this! Great Job!!!
The meticulous effort that you put into this kitchen transformation speaks volumes to your passion for, and dedication to the art of interior design. There’s no doubt that you’ll leave countless smiles in any space you touch. #TouchedbyJade
The meticulous effort that you put into this kitchen transformation speaks volumes to your passion for, and dedication to the art of interior design. There’s no doubt that you’ll leave countless smiles in any space you touch. #TouchedbyJade
Love the details and resourcefulness! Can’t wait to read more!
Thank you so much. I’m glad you like it. I’m working on some new blog posts and I’m really excited to share some of the projects that I’ve been working on
Love the details and resourcefulness! Can’t wait to read more!
Thank you so much. I’m glad you like it. I’m working on some new blog posts and I’m really excited to share some of the projects that I’ve been working on
I’m really impressed by this reveal.You have painstakingly presented a truly sincere stages to ‘the making of ‘ this beautiful yet highly ‘practical’ kitchen. The details are exquisite. It’s a job well done.
Congratulations!!
I’m really impressed by this reveal.You have painstakingly presented a truly sincere stages to ‘the making of ‘ this beautiful yet highly ‘practical’ kitchen. The details are exquisite. It’s a job well done.
Congratulations!!