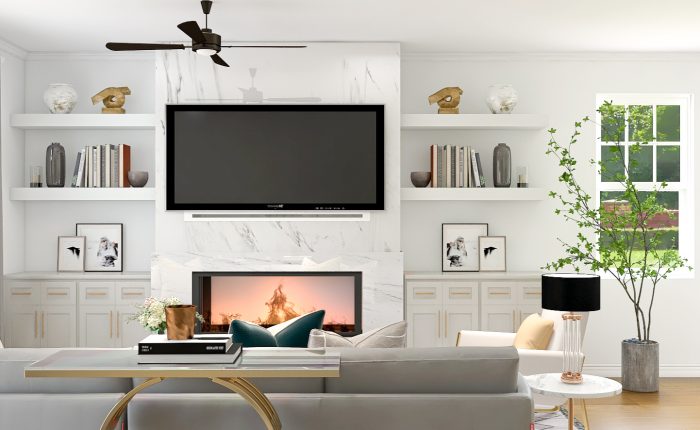
I’m so excited to finally share my completed formal living room. This is officially the 3rd room that is completed in my home (the first 2 are my toddler and baby’s room). I have been putting this project off for the longest time due to what’s currently going on in the world *coughs COVID19*. As thing slowly get back to normal, I’m happy to have somewhere to host my family and friends.
Fun Fact, the large furniture items here were the first pieces we ordered and got delivered because they are custom pieces and took about 12 weeks to get delivered. Since we had the base furniture already for the space, I had to finish up the room with some décor items and smaller furniture pieces.
I’m glad this was not a complete blank space because it meant the budget for this project wasn’t huge. My goal with this post is to show you some of the ways I was able to bring this room to life, where I splurged, saved and tips on how to make your space cohesive.

[do_widget id=custom_html-14]
Pick your color theme /palette
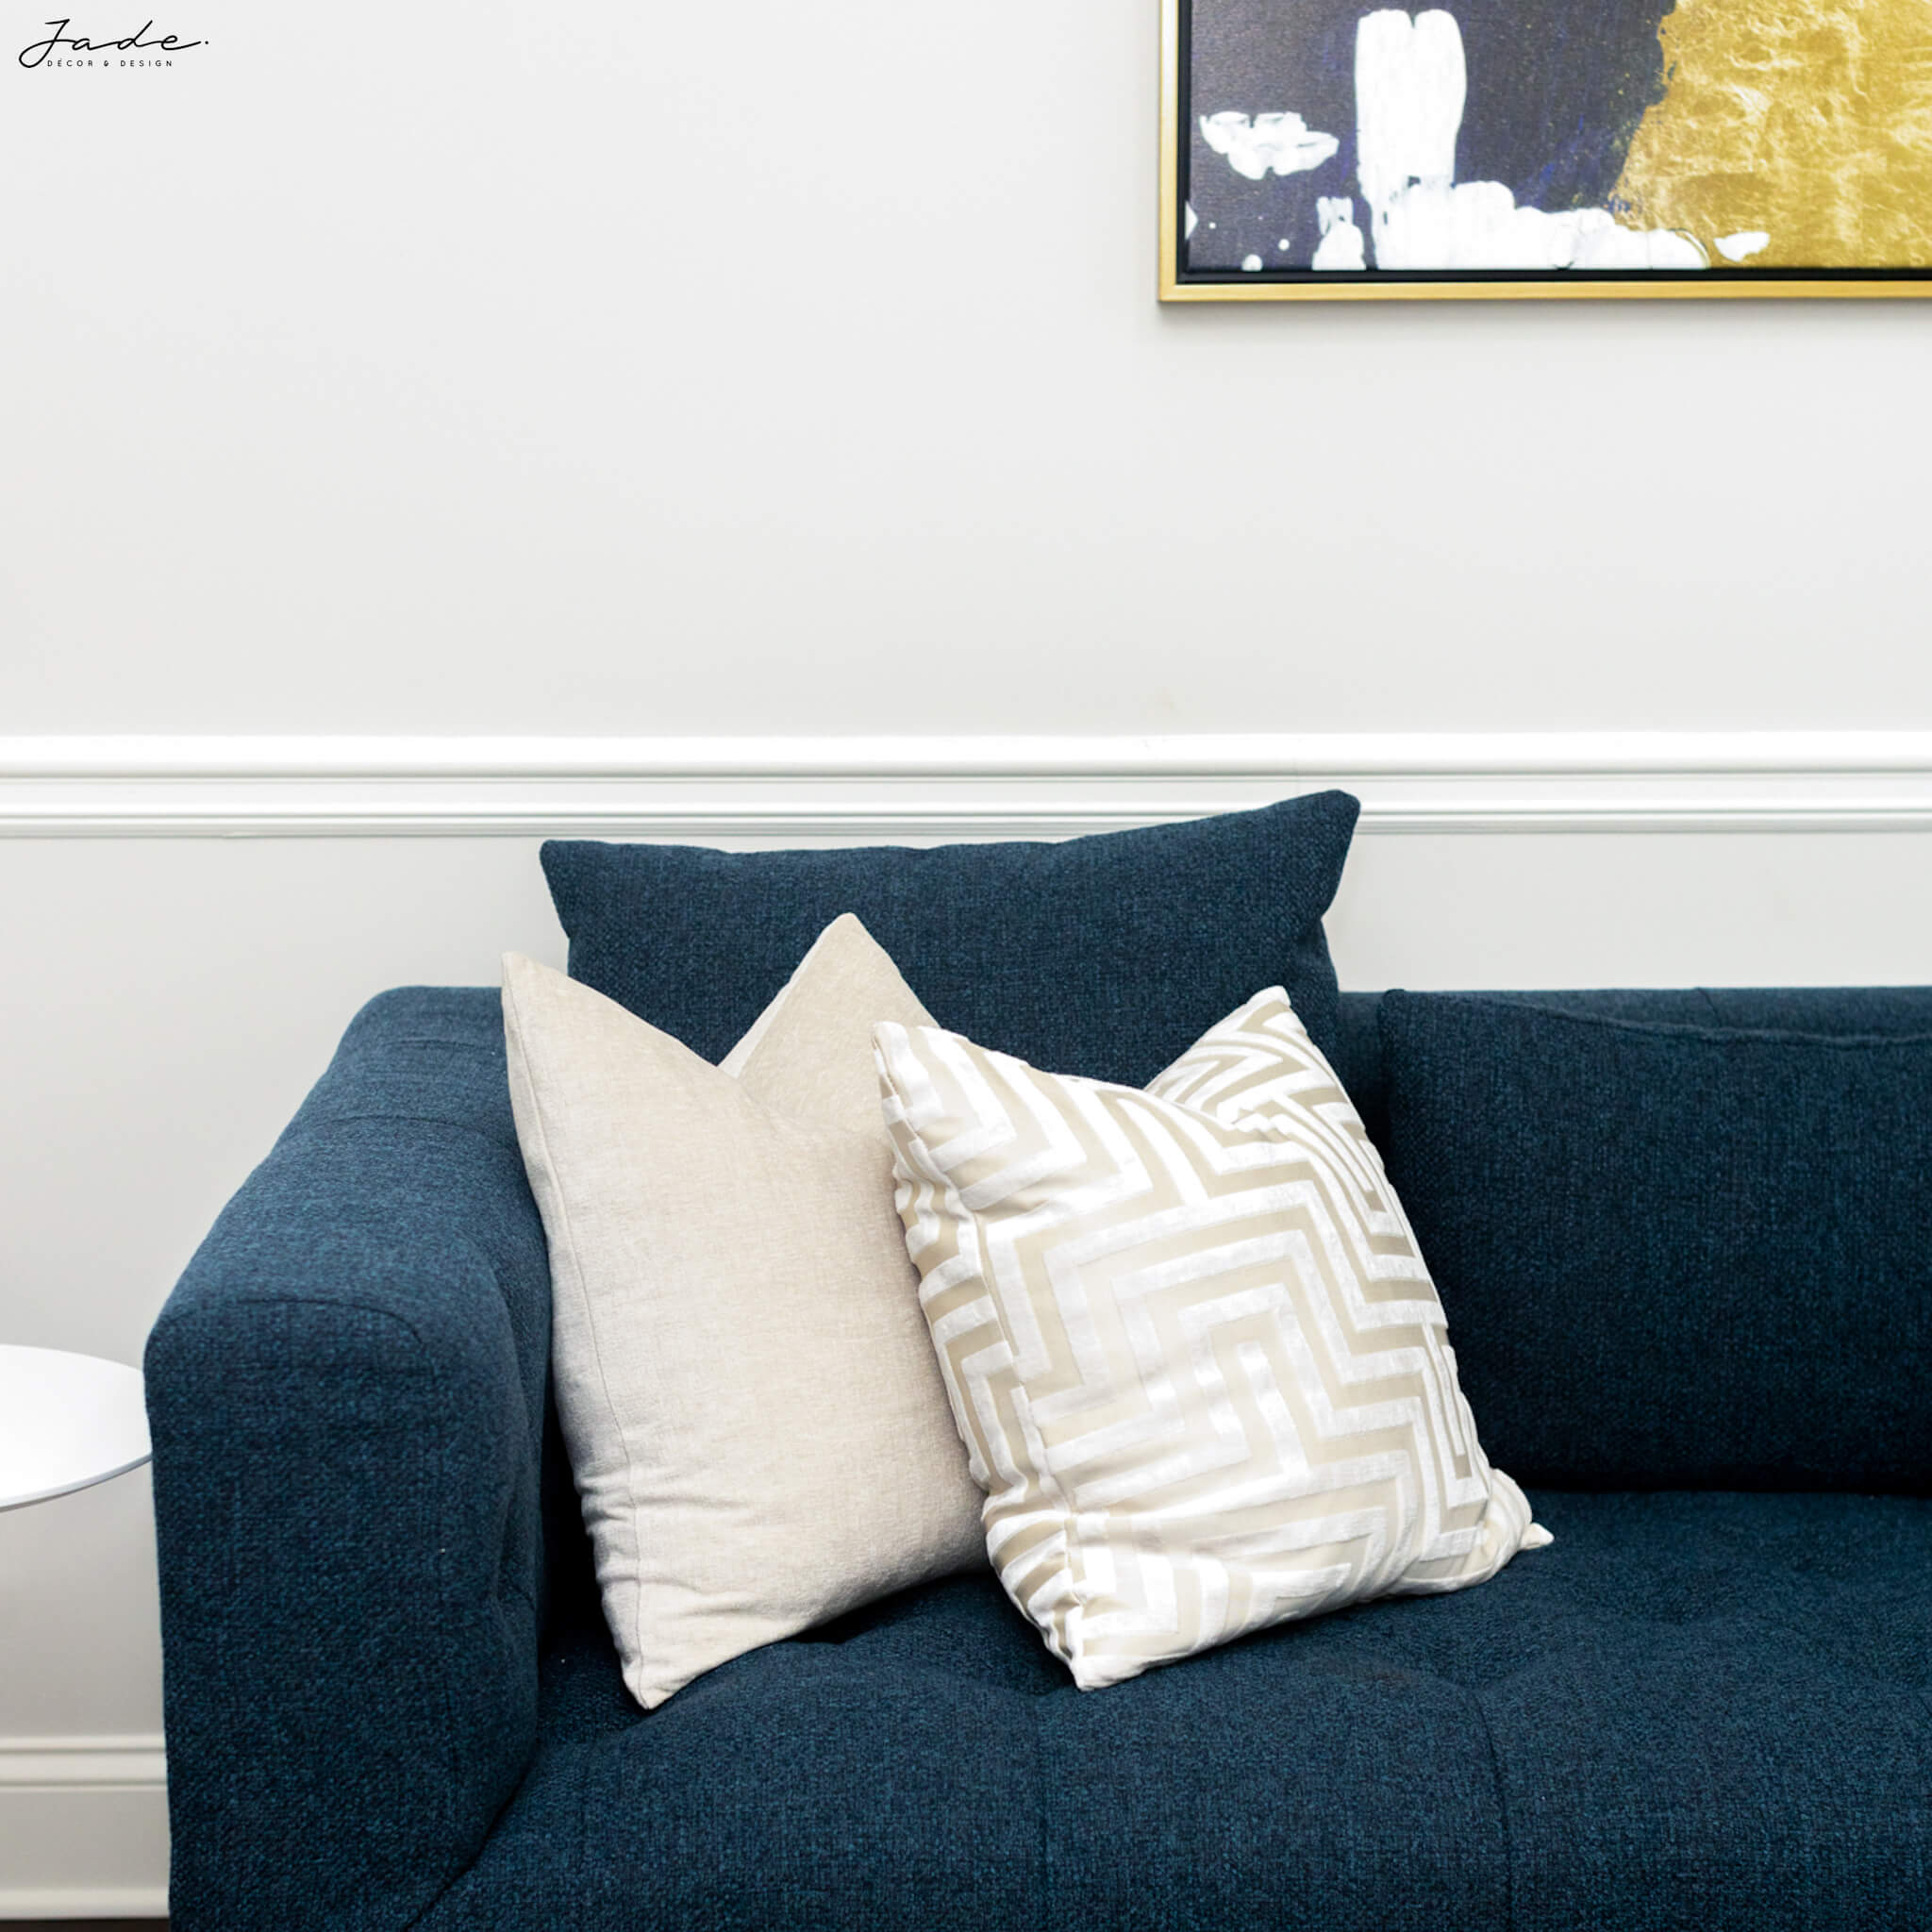
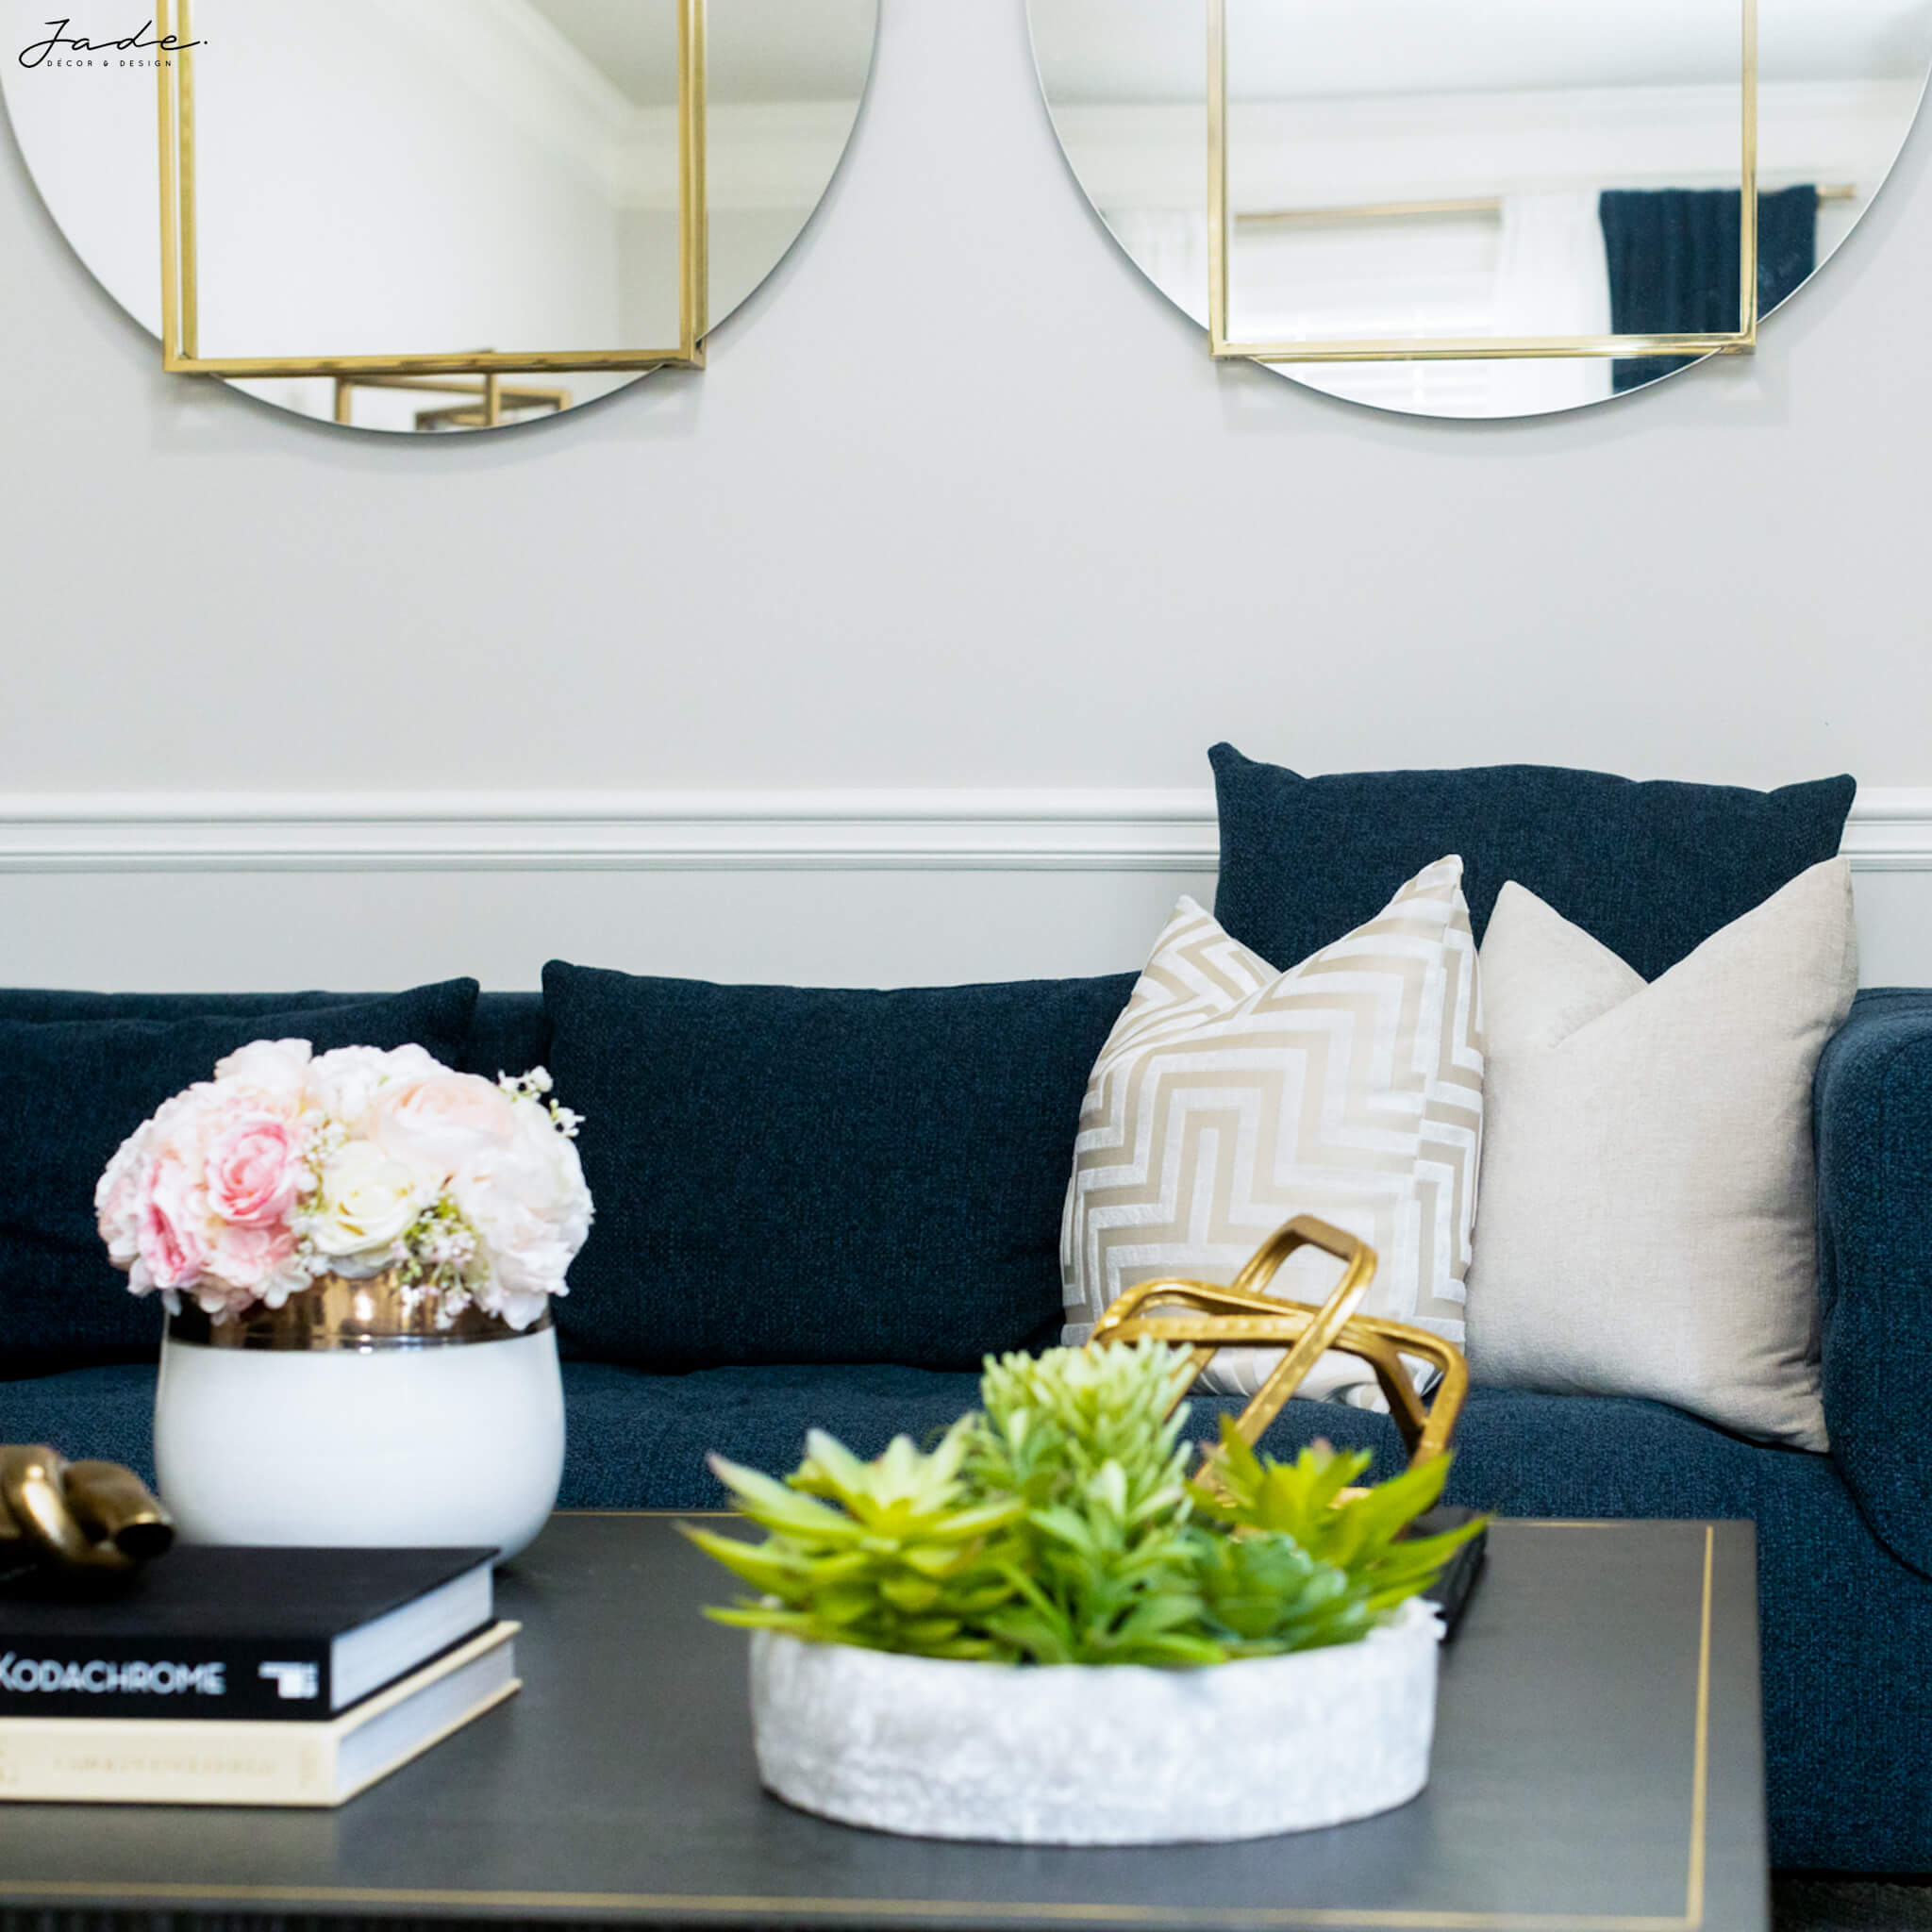
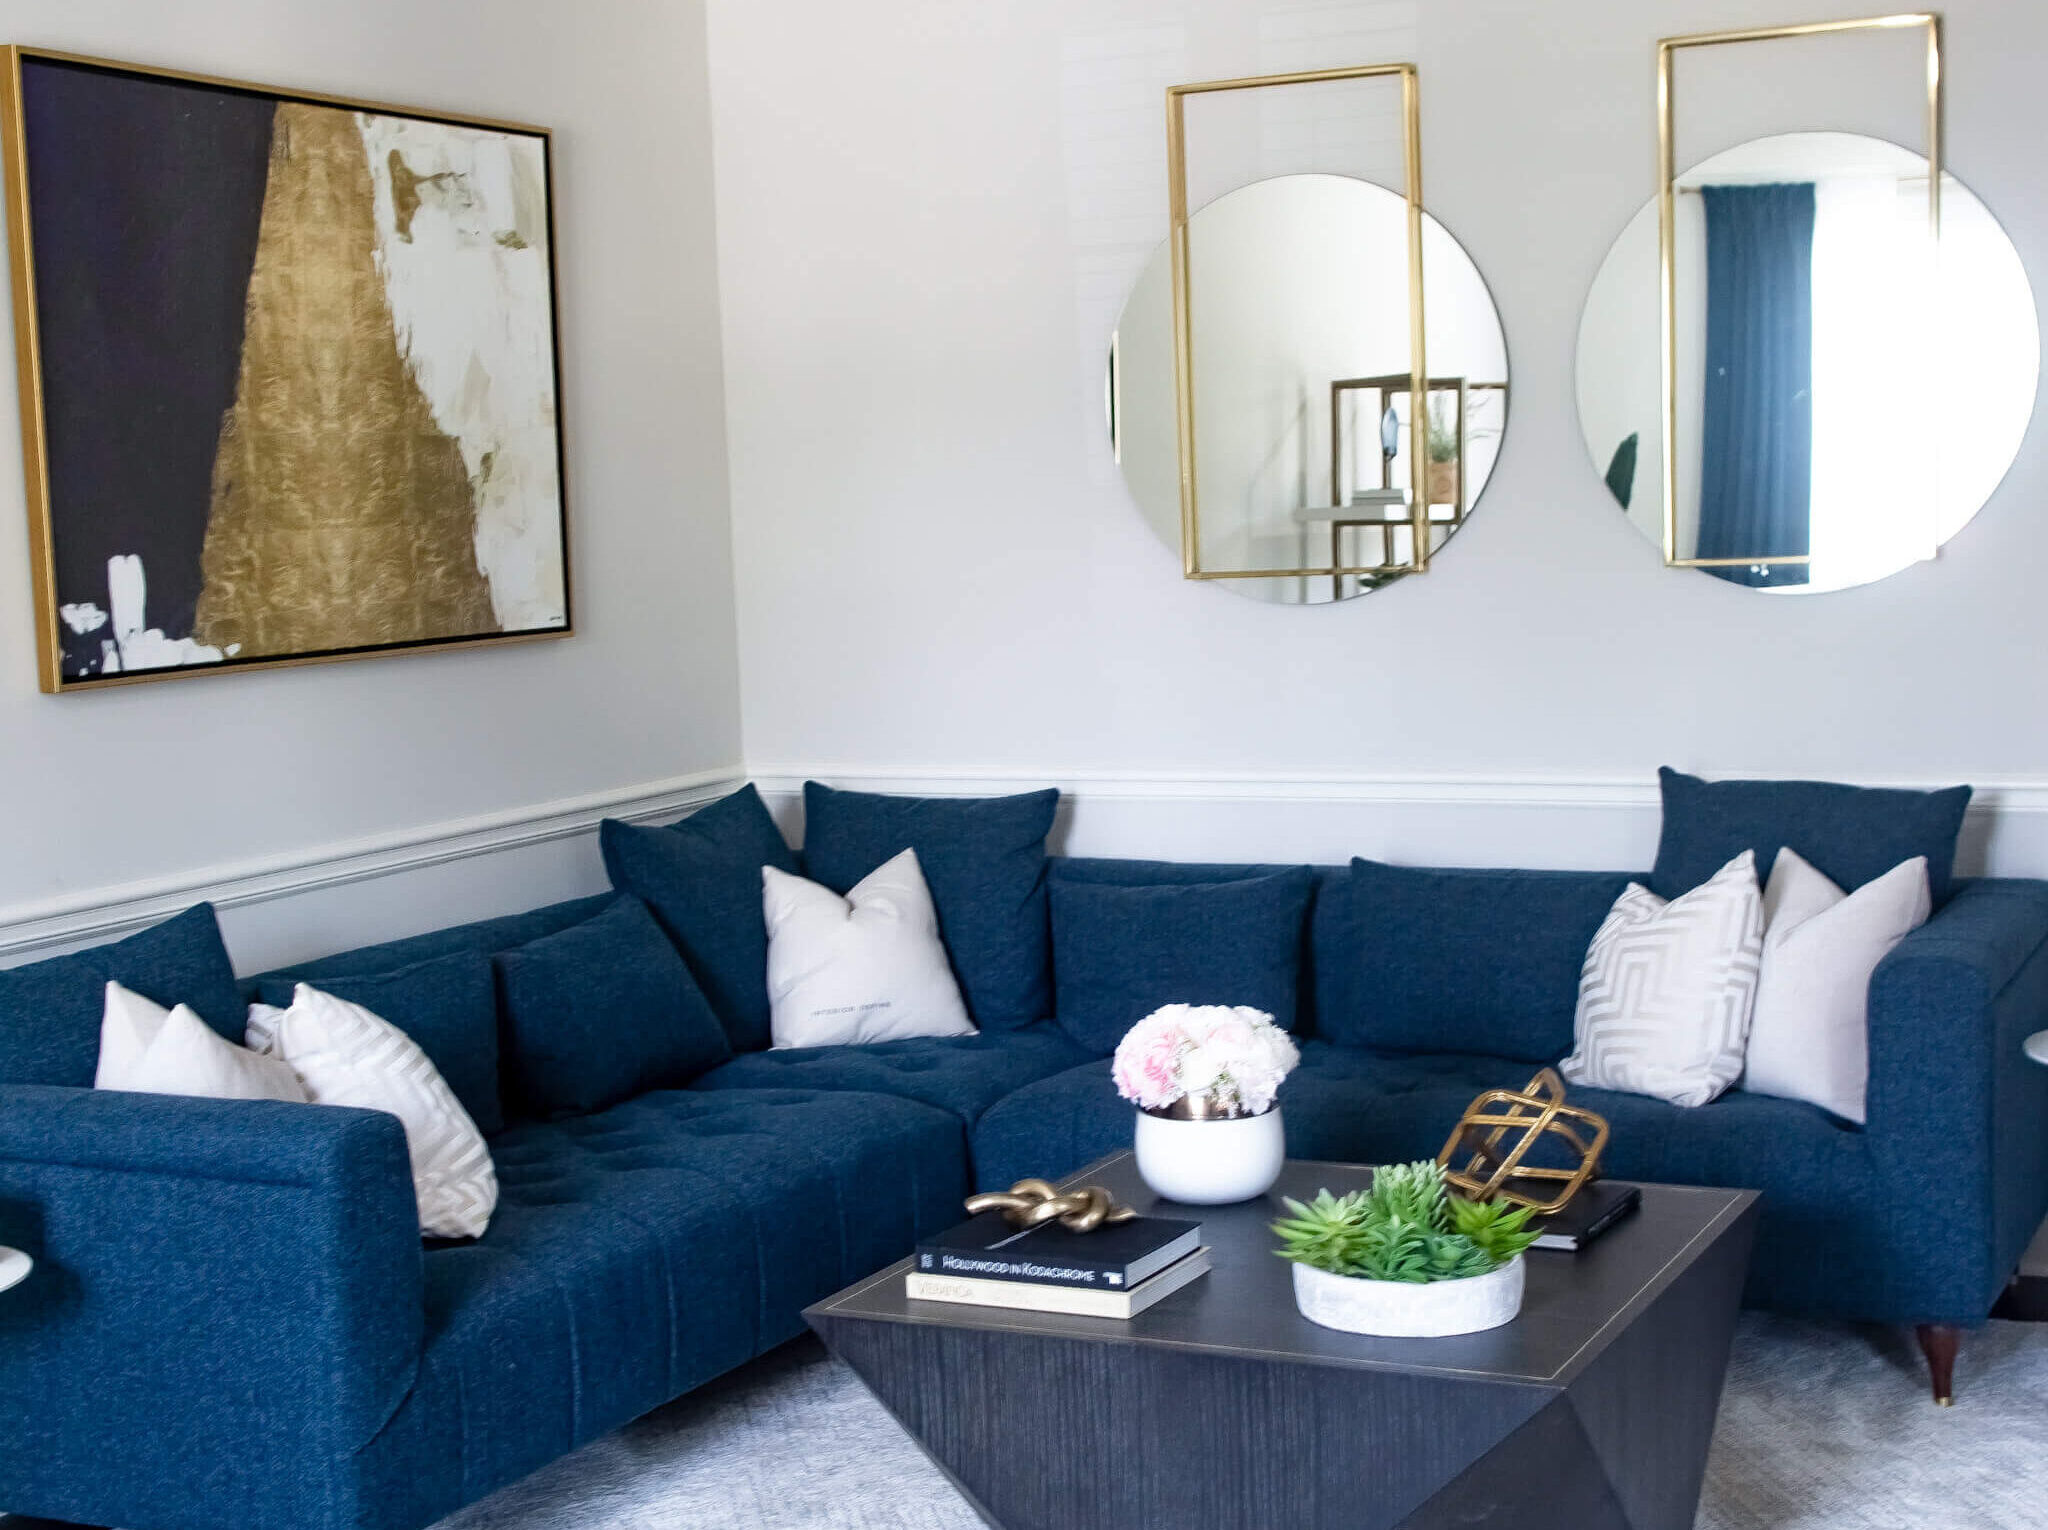
This was pretty easy for me since I already had the foundational elements. The general theme for my house is grey and blue with hints of brass. But in this living room, I still wanted color but I opted for this beautiful shade of teal and white. I decided to use these colors as my base and accentuate with black and brass to complement the space. Once I had chosen my color, I had a guide for when I went shopping. Keeping the accent colors neutral, allowed this gorgeous teal shine!
Read the room
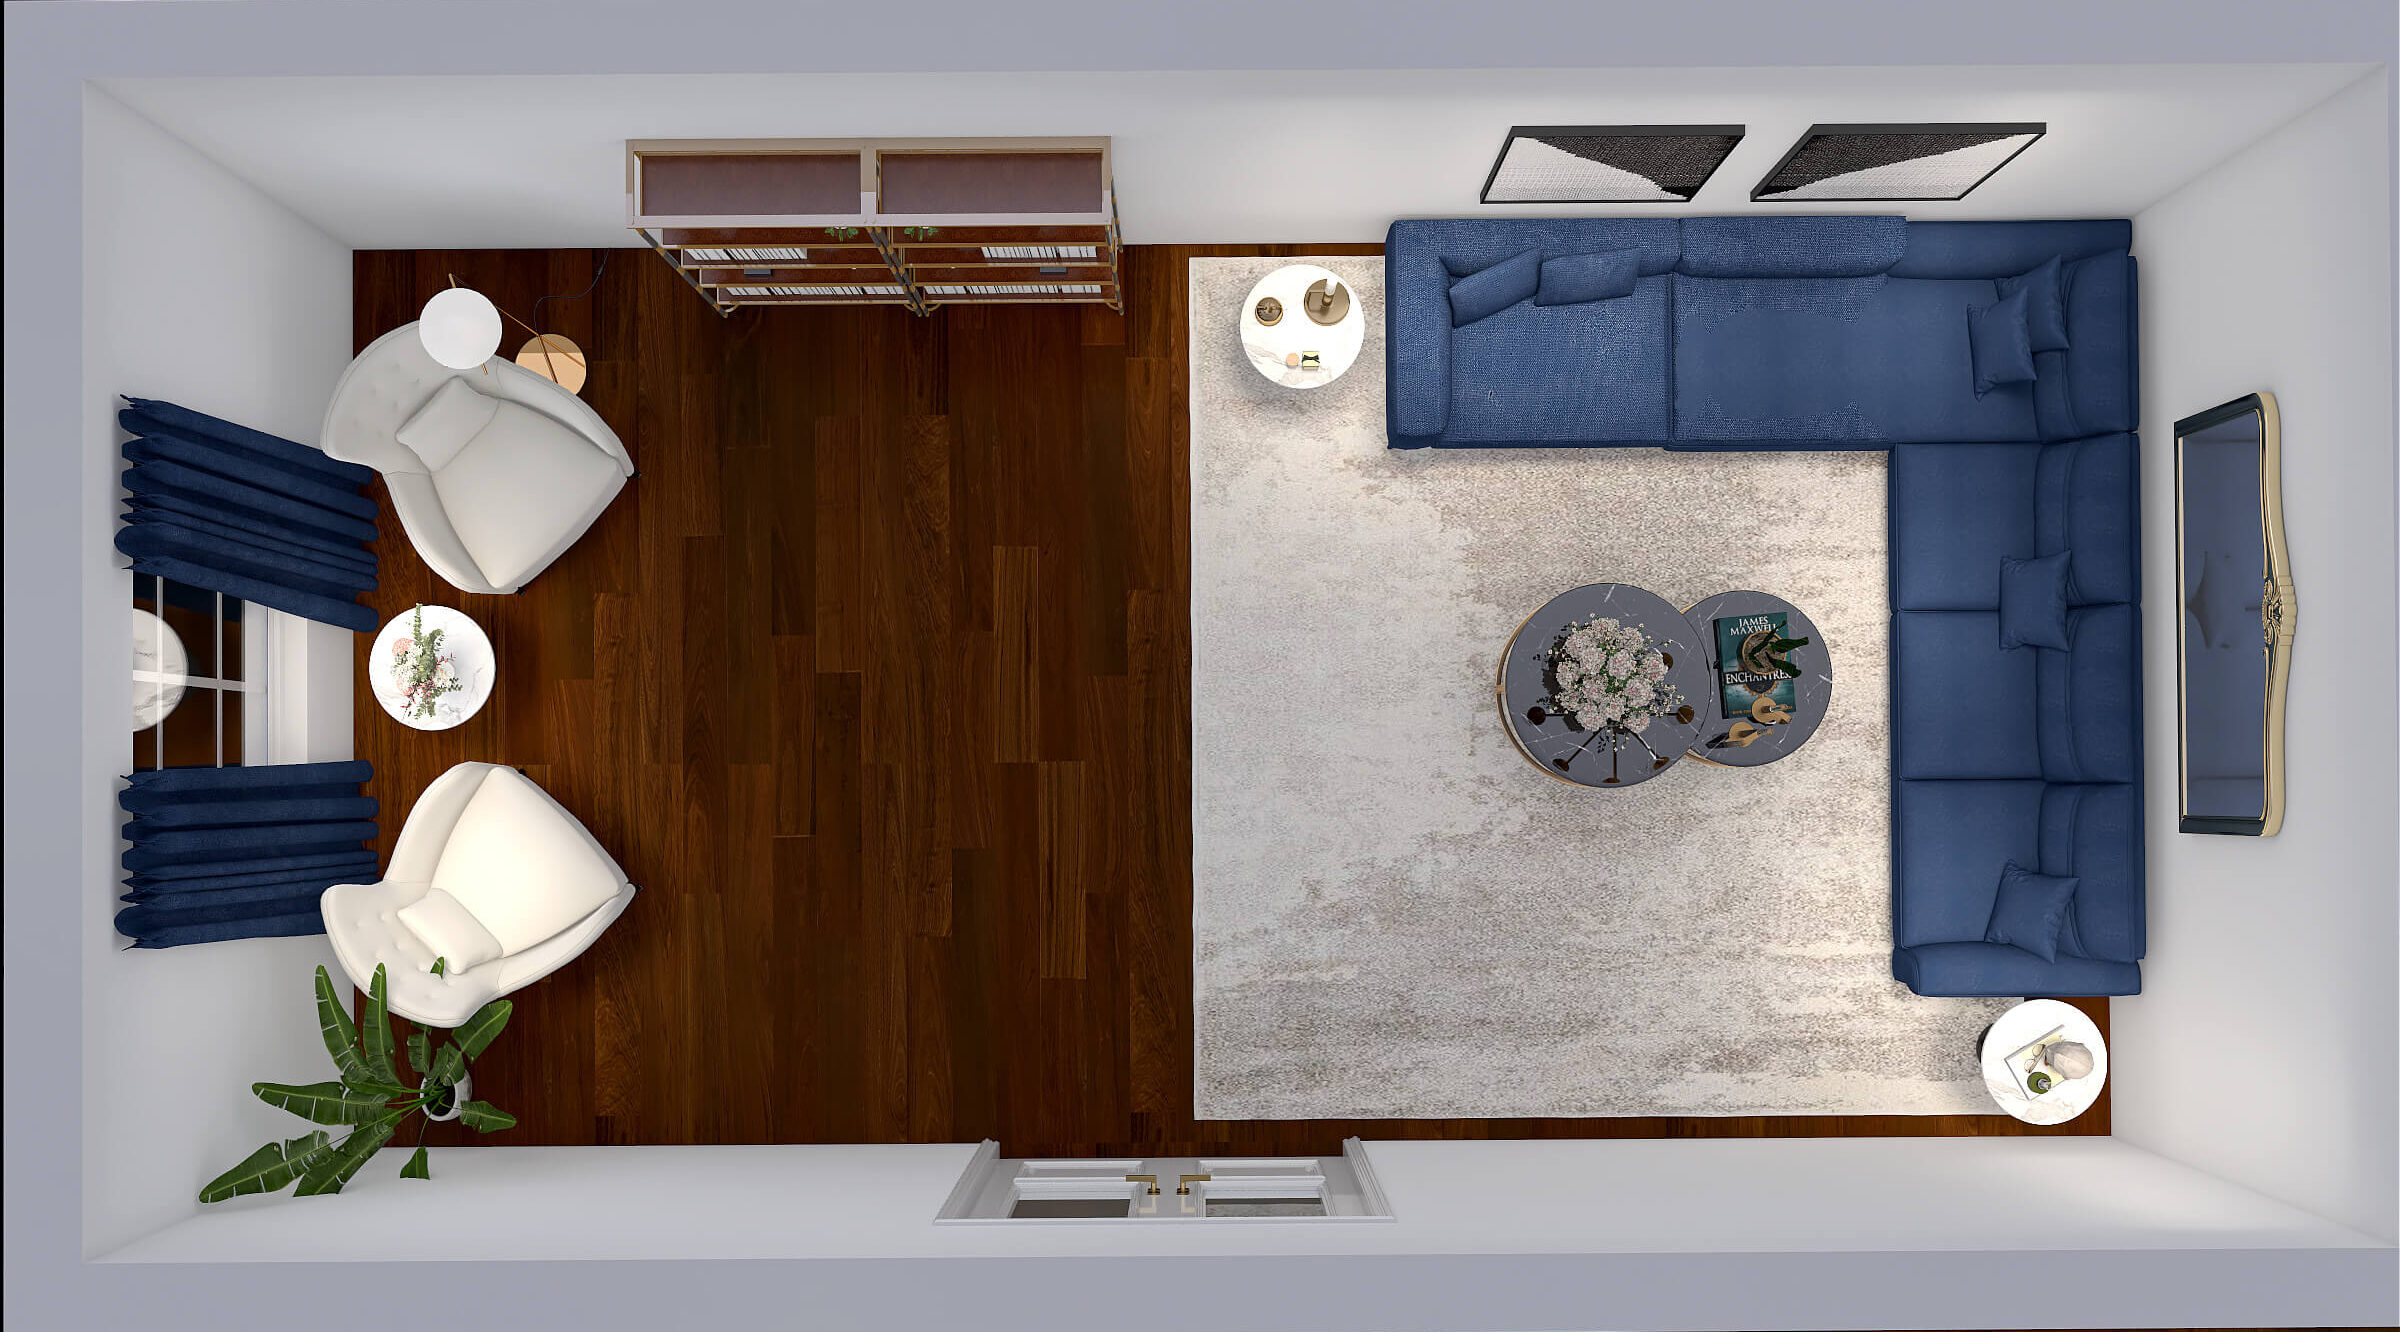
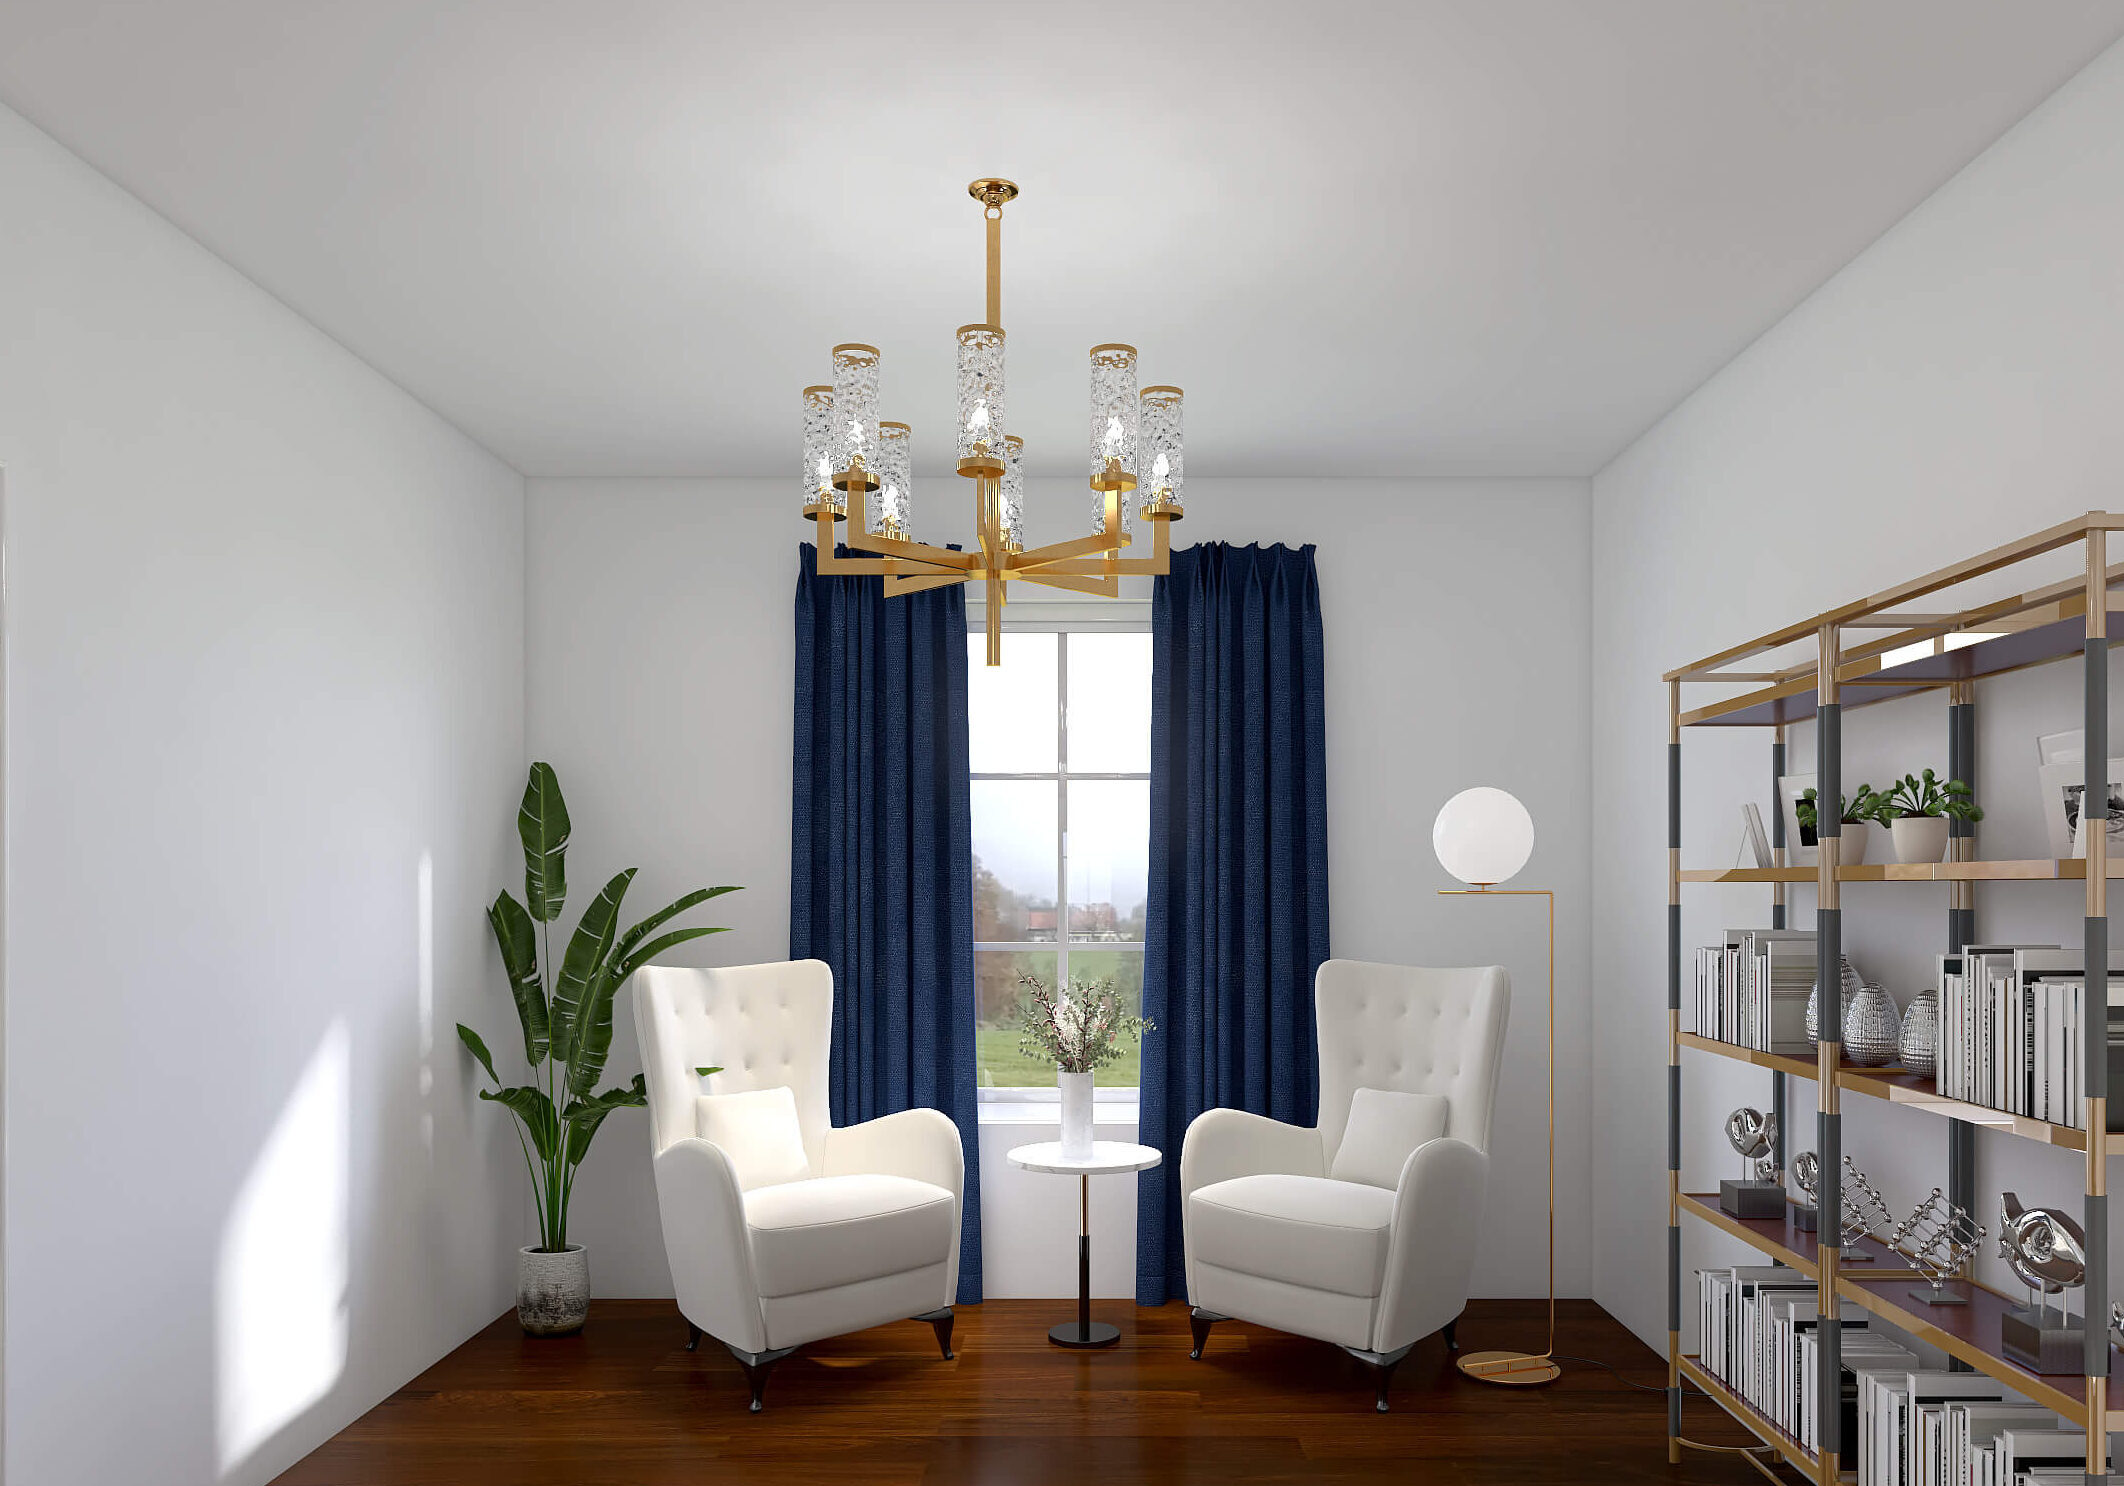
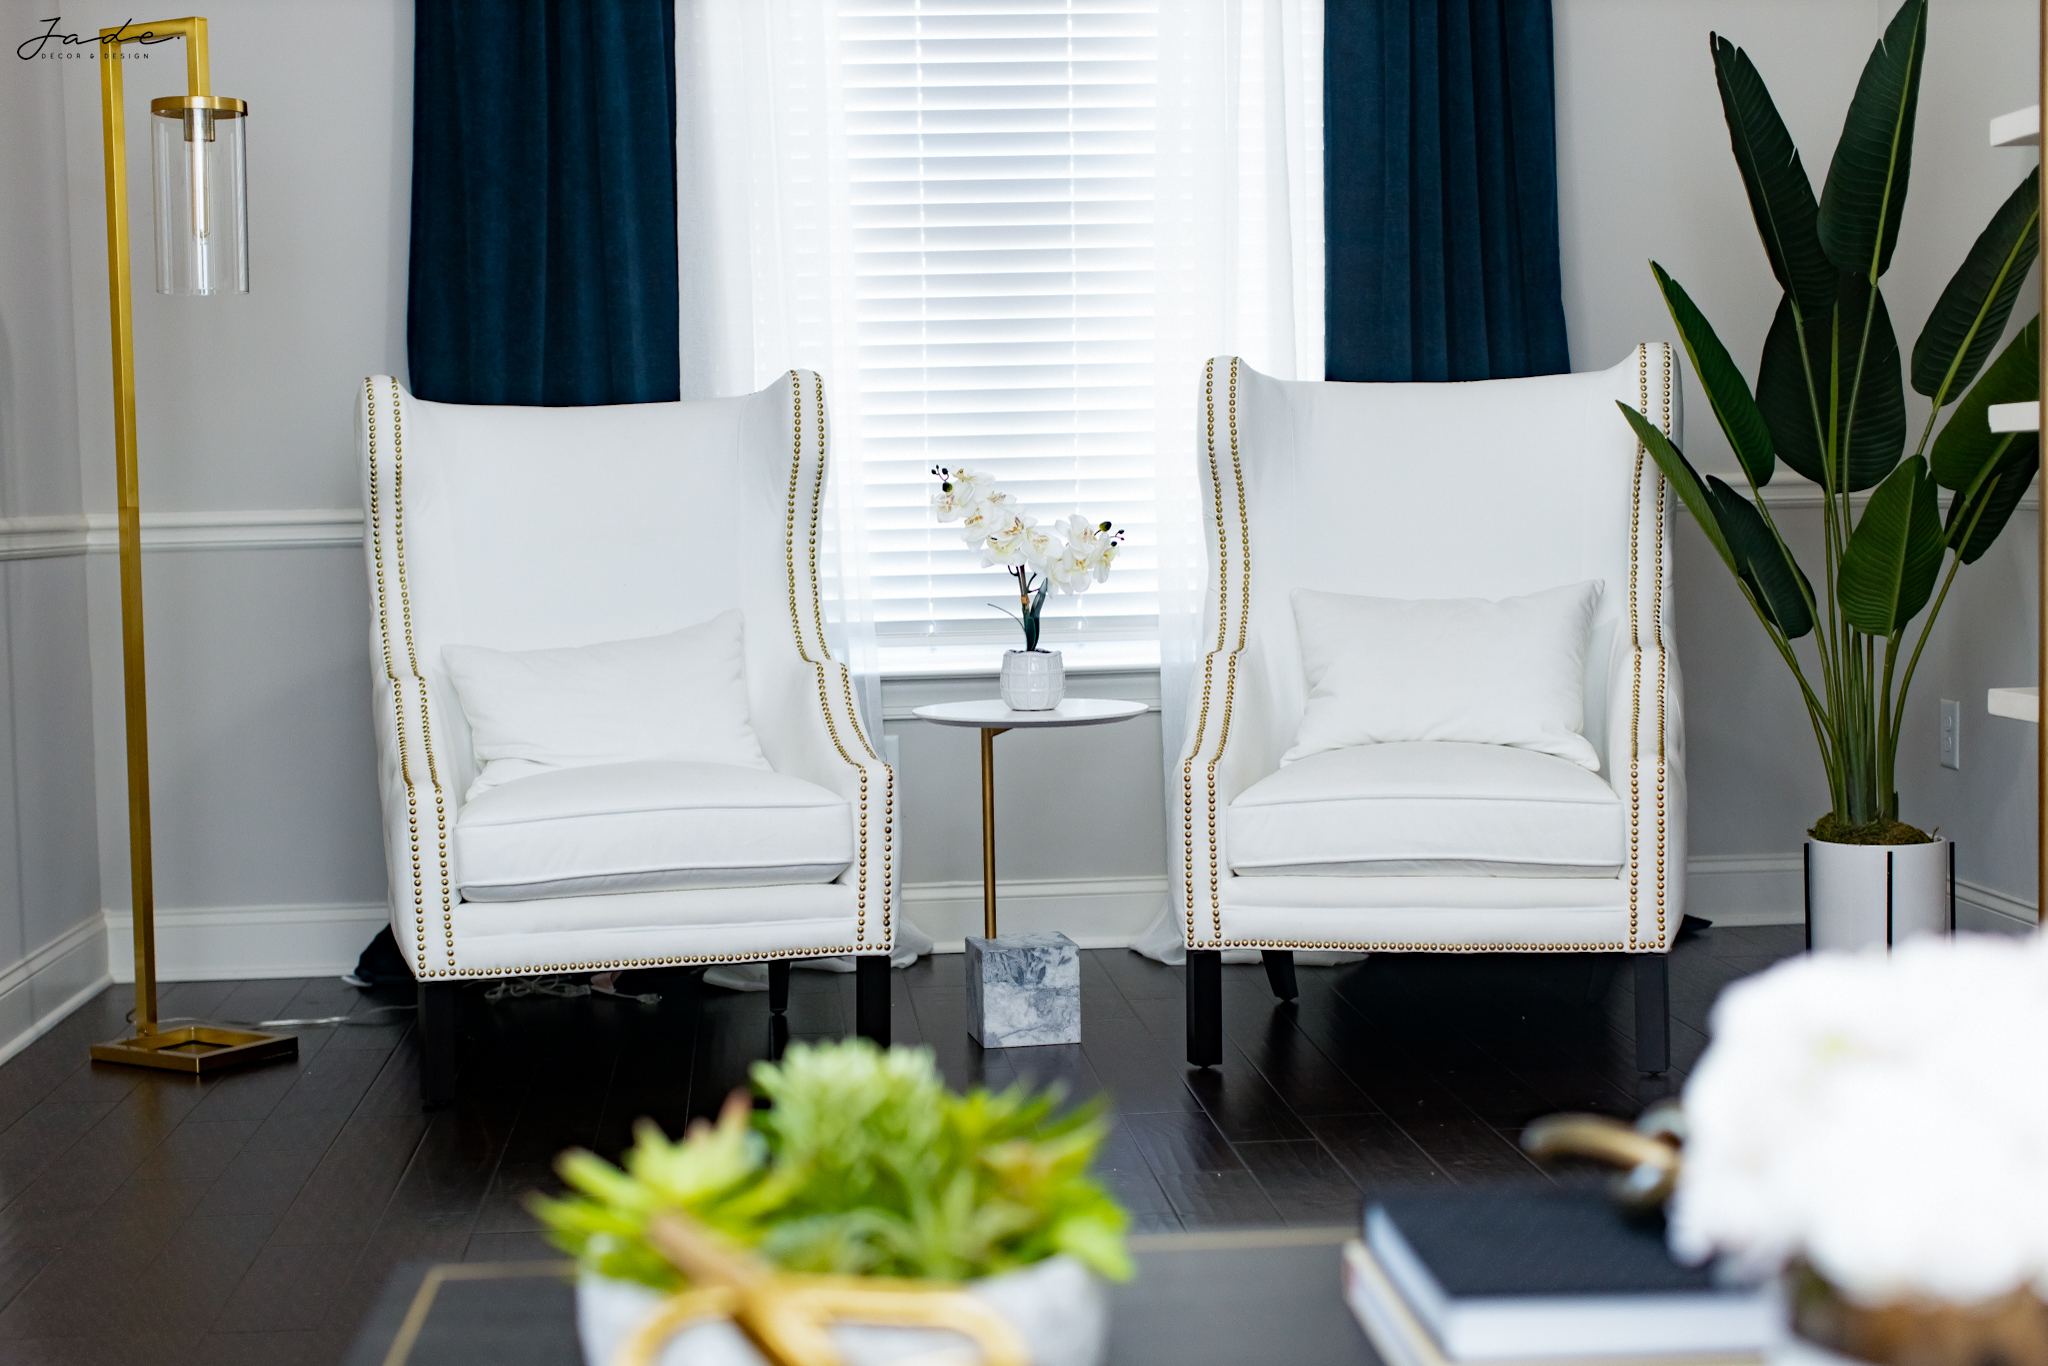
Basically, think about how you would use the space. Since this is the formal living room and kids are not allowed, I could take some risks with the color choices (see white chairs and multiple angled coffee table). The living room is wide so I could create 2 zones in this space; 1 for more intimate conversations one on one and another for a larger group hang out. I also made sure both spaces were open to each other and could be used to host a larger crowd easily.
Conceptualize and Plan
Whenever I want to create a new space, I build a render of that space to help me with space planning and making the elements cohesive. I created a render of this space and I was able to decide which furniture pieces worked well in the space and which colors to use for different elements. I kept tweaking till I found the combination that was perfect for me.
Check out my room transformation page for some of my before and afters and my E-Design page for more 3D designs and renders. For more information about my design services, check out my services page
Budget and Prioritize
Before I purchased all my items, I created a quick mood board to see how all the actual furniture pieces will look next to each other.
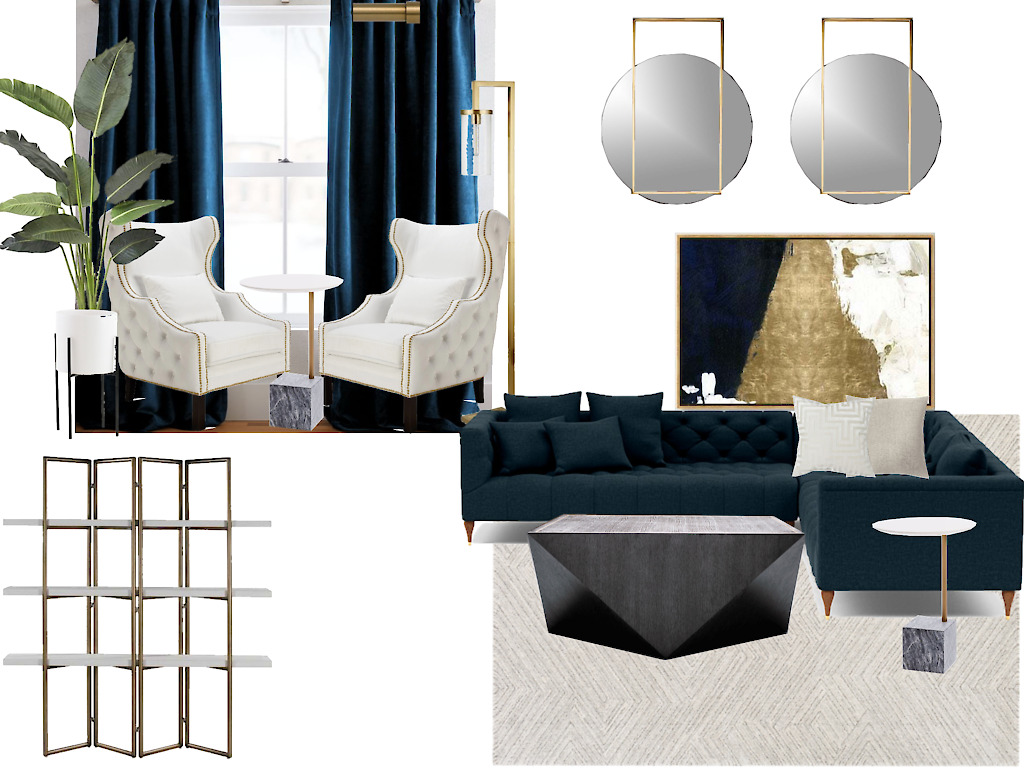
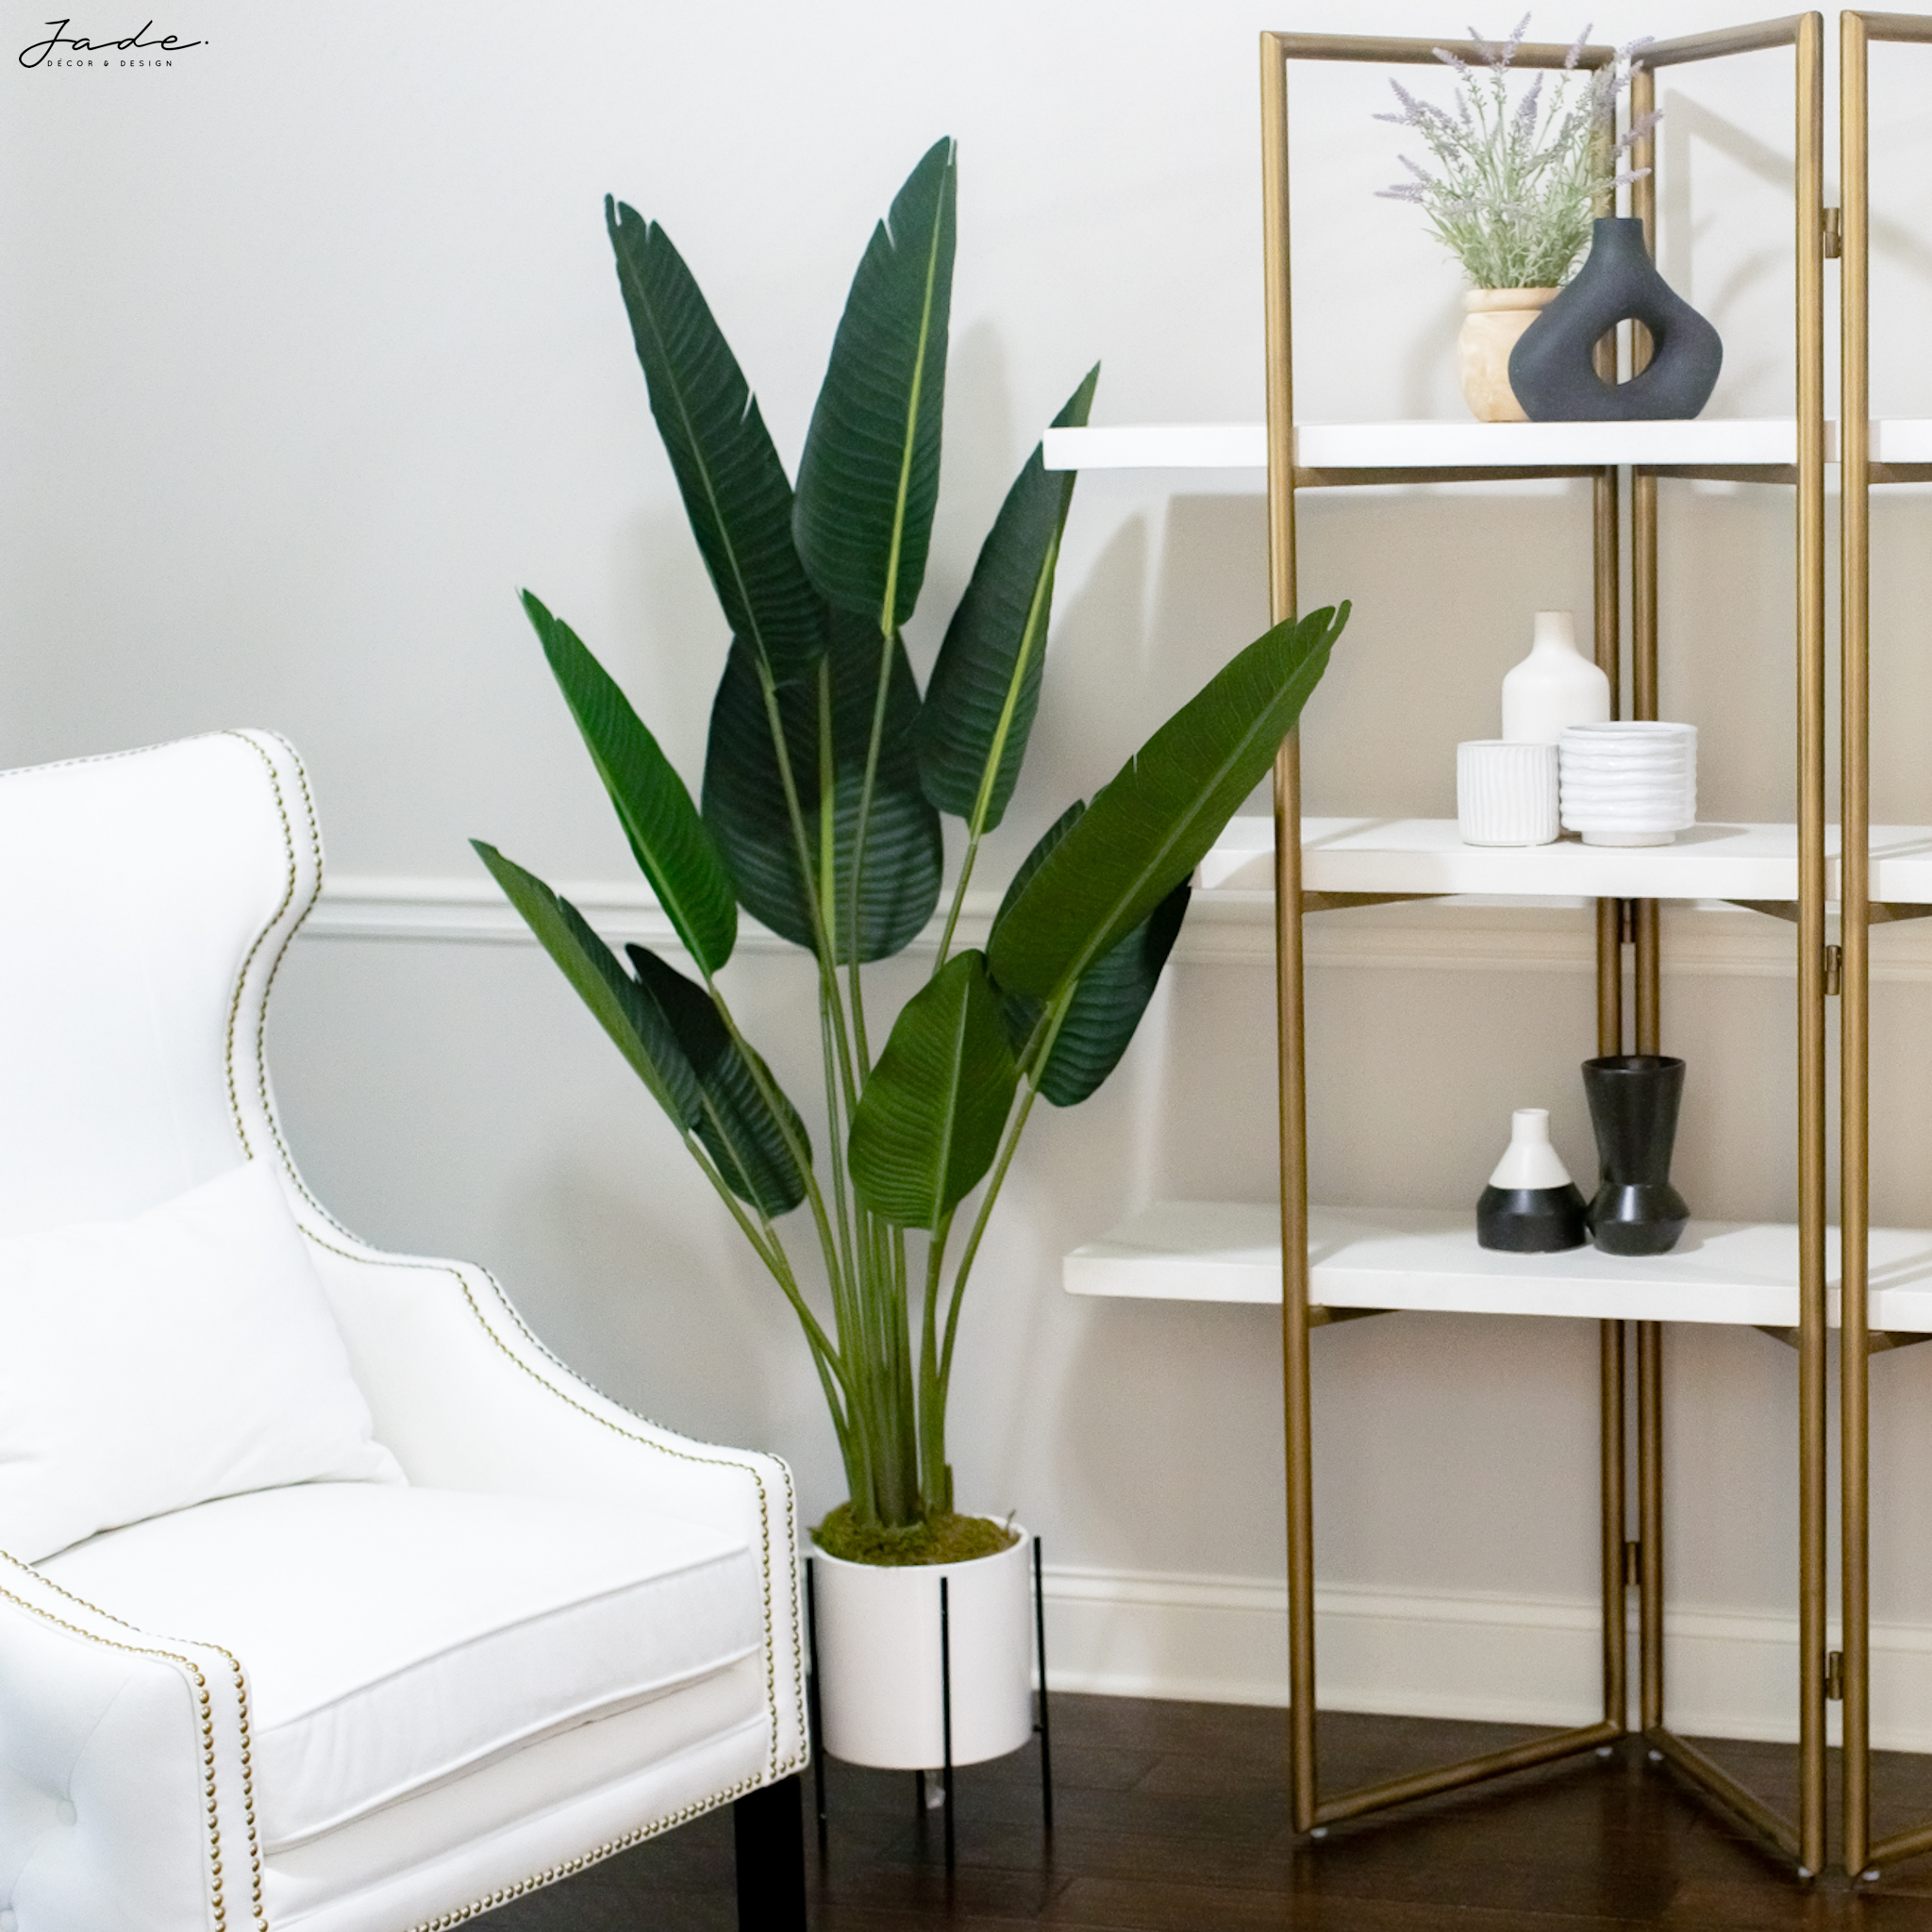
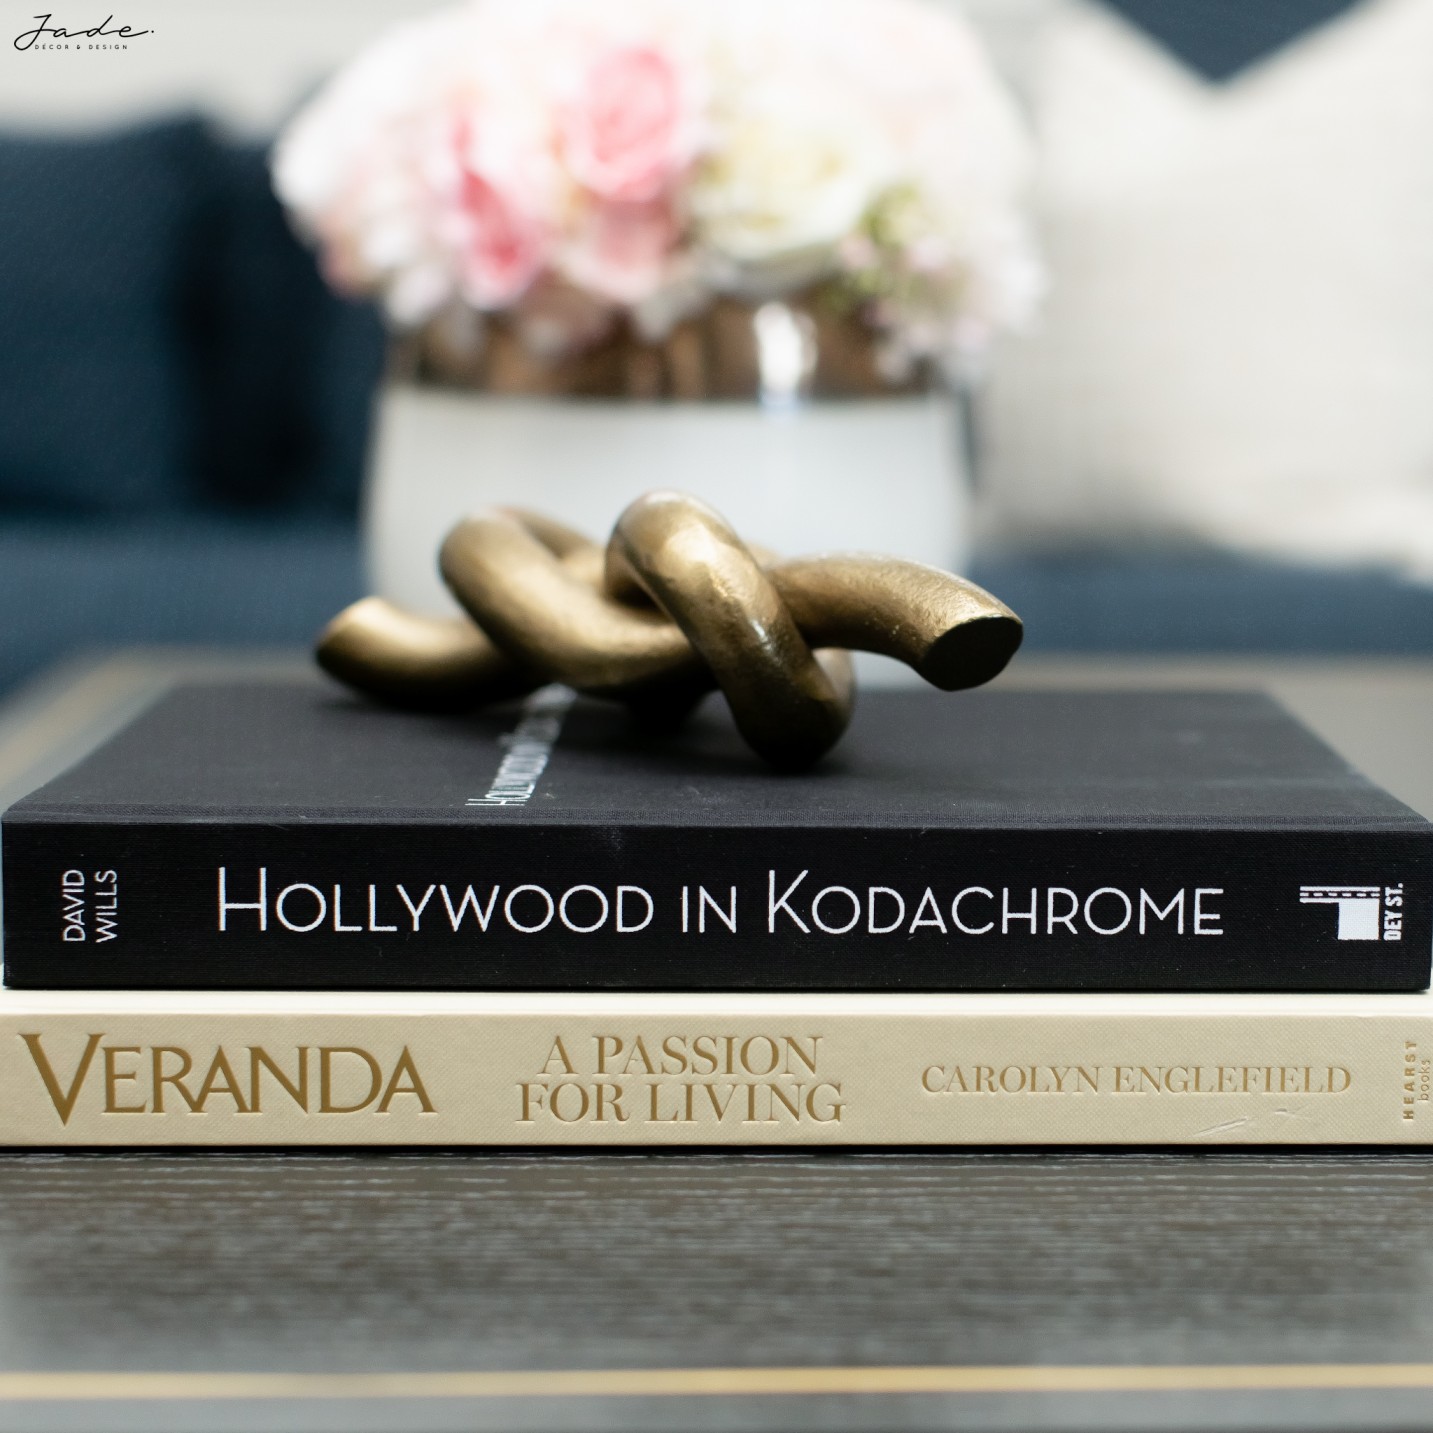
I also had a budget I was working with and I had to decide where I wanted to splurge and where I wanted to save. I invested in a gorgeous unique coffee table and high quality area rug. I wanted items that would last and I wouldn’t need to change soon. However I decided to save on the wall accessories, DIY’ed my potted plant and the rest of the décor items in this living room space.
Create a Moment
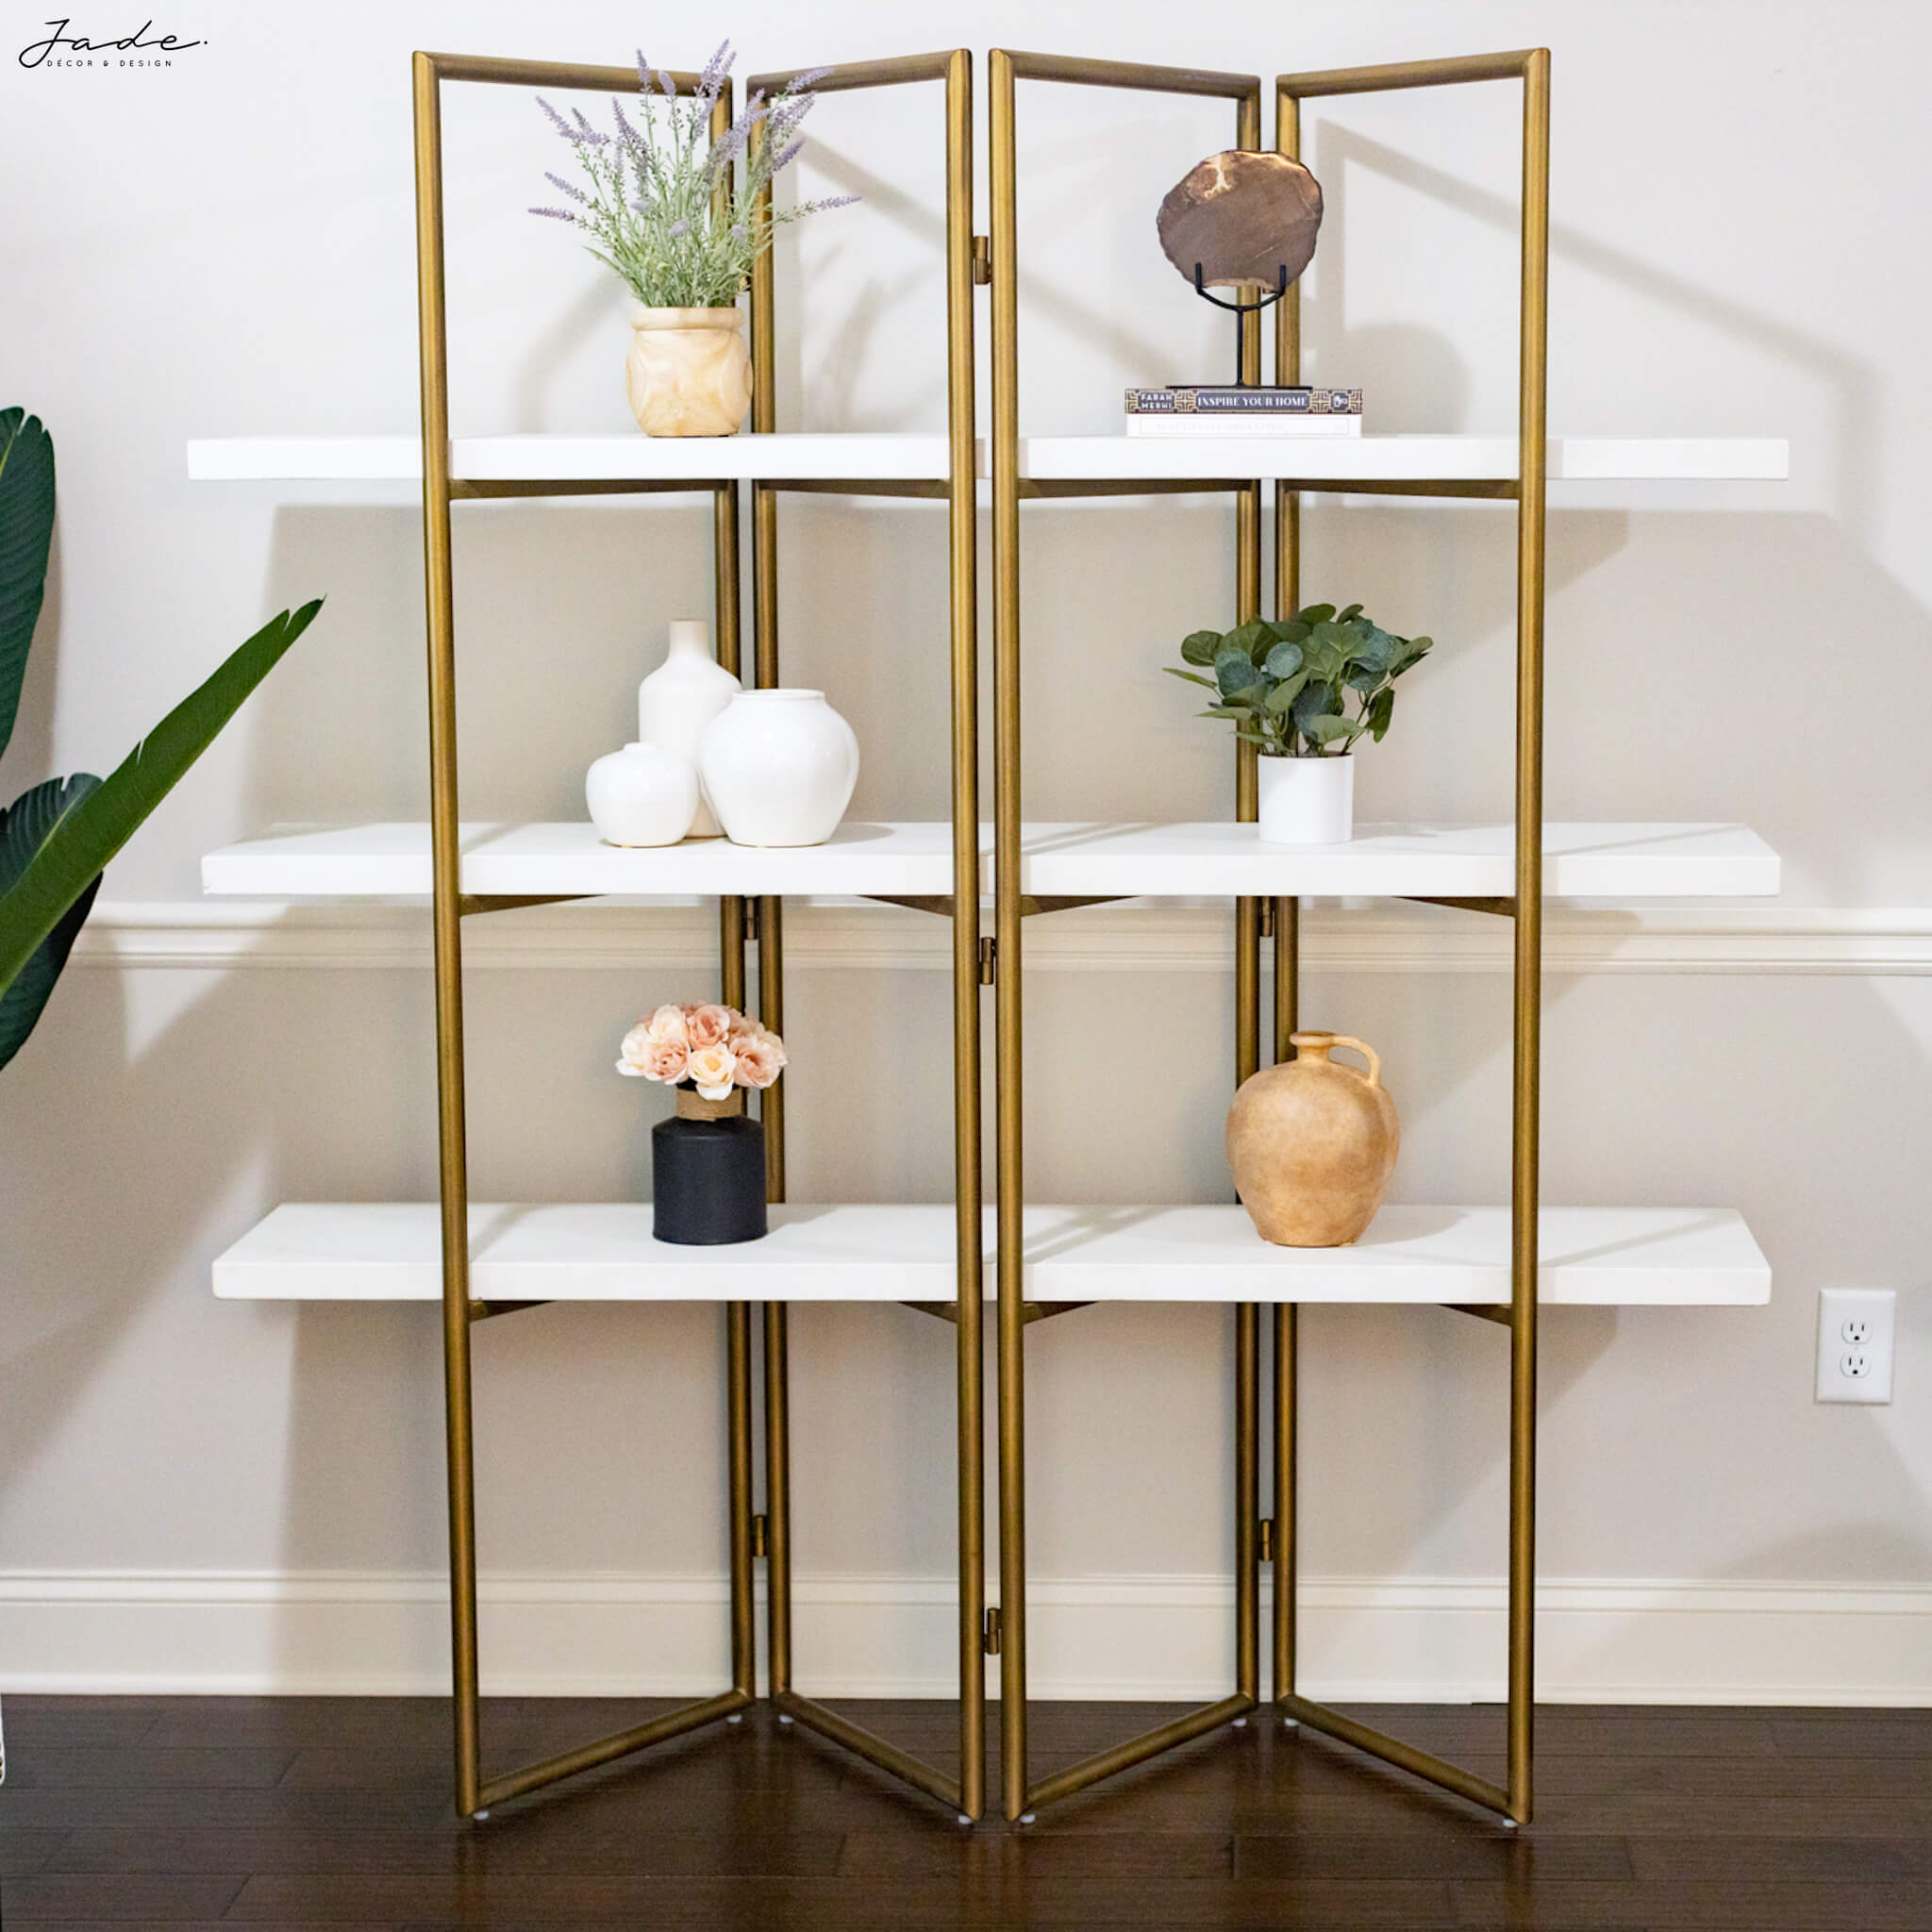
When you walk in through the front doors and past the formal living room, there is this blank wall right in your face. What better way to create some separation between the two seating areas while also creating a moment as you walk past than a “shelfie” moment. Having this open shelf here makes good use of a blank wall but also creates a feature moment.

Don’t be afraid to change your mind
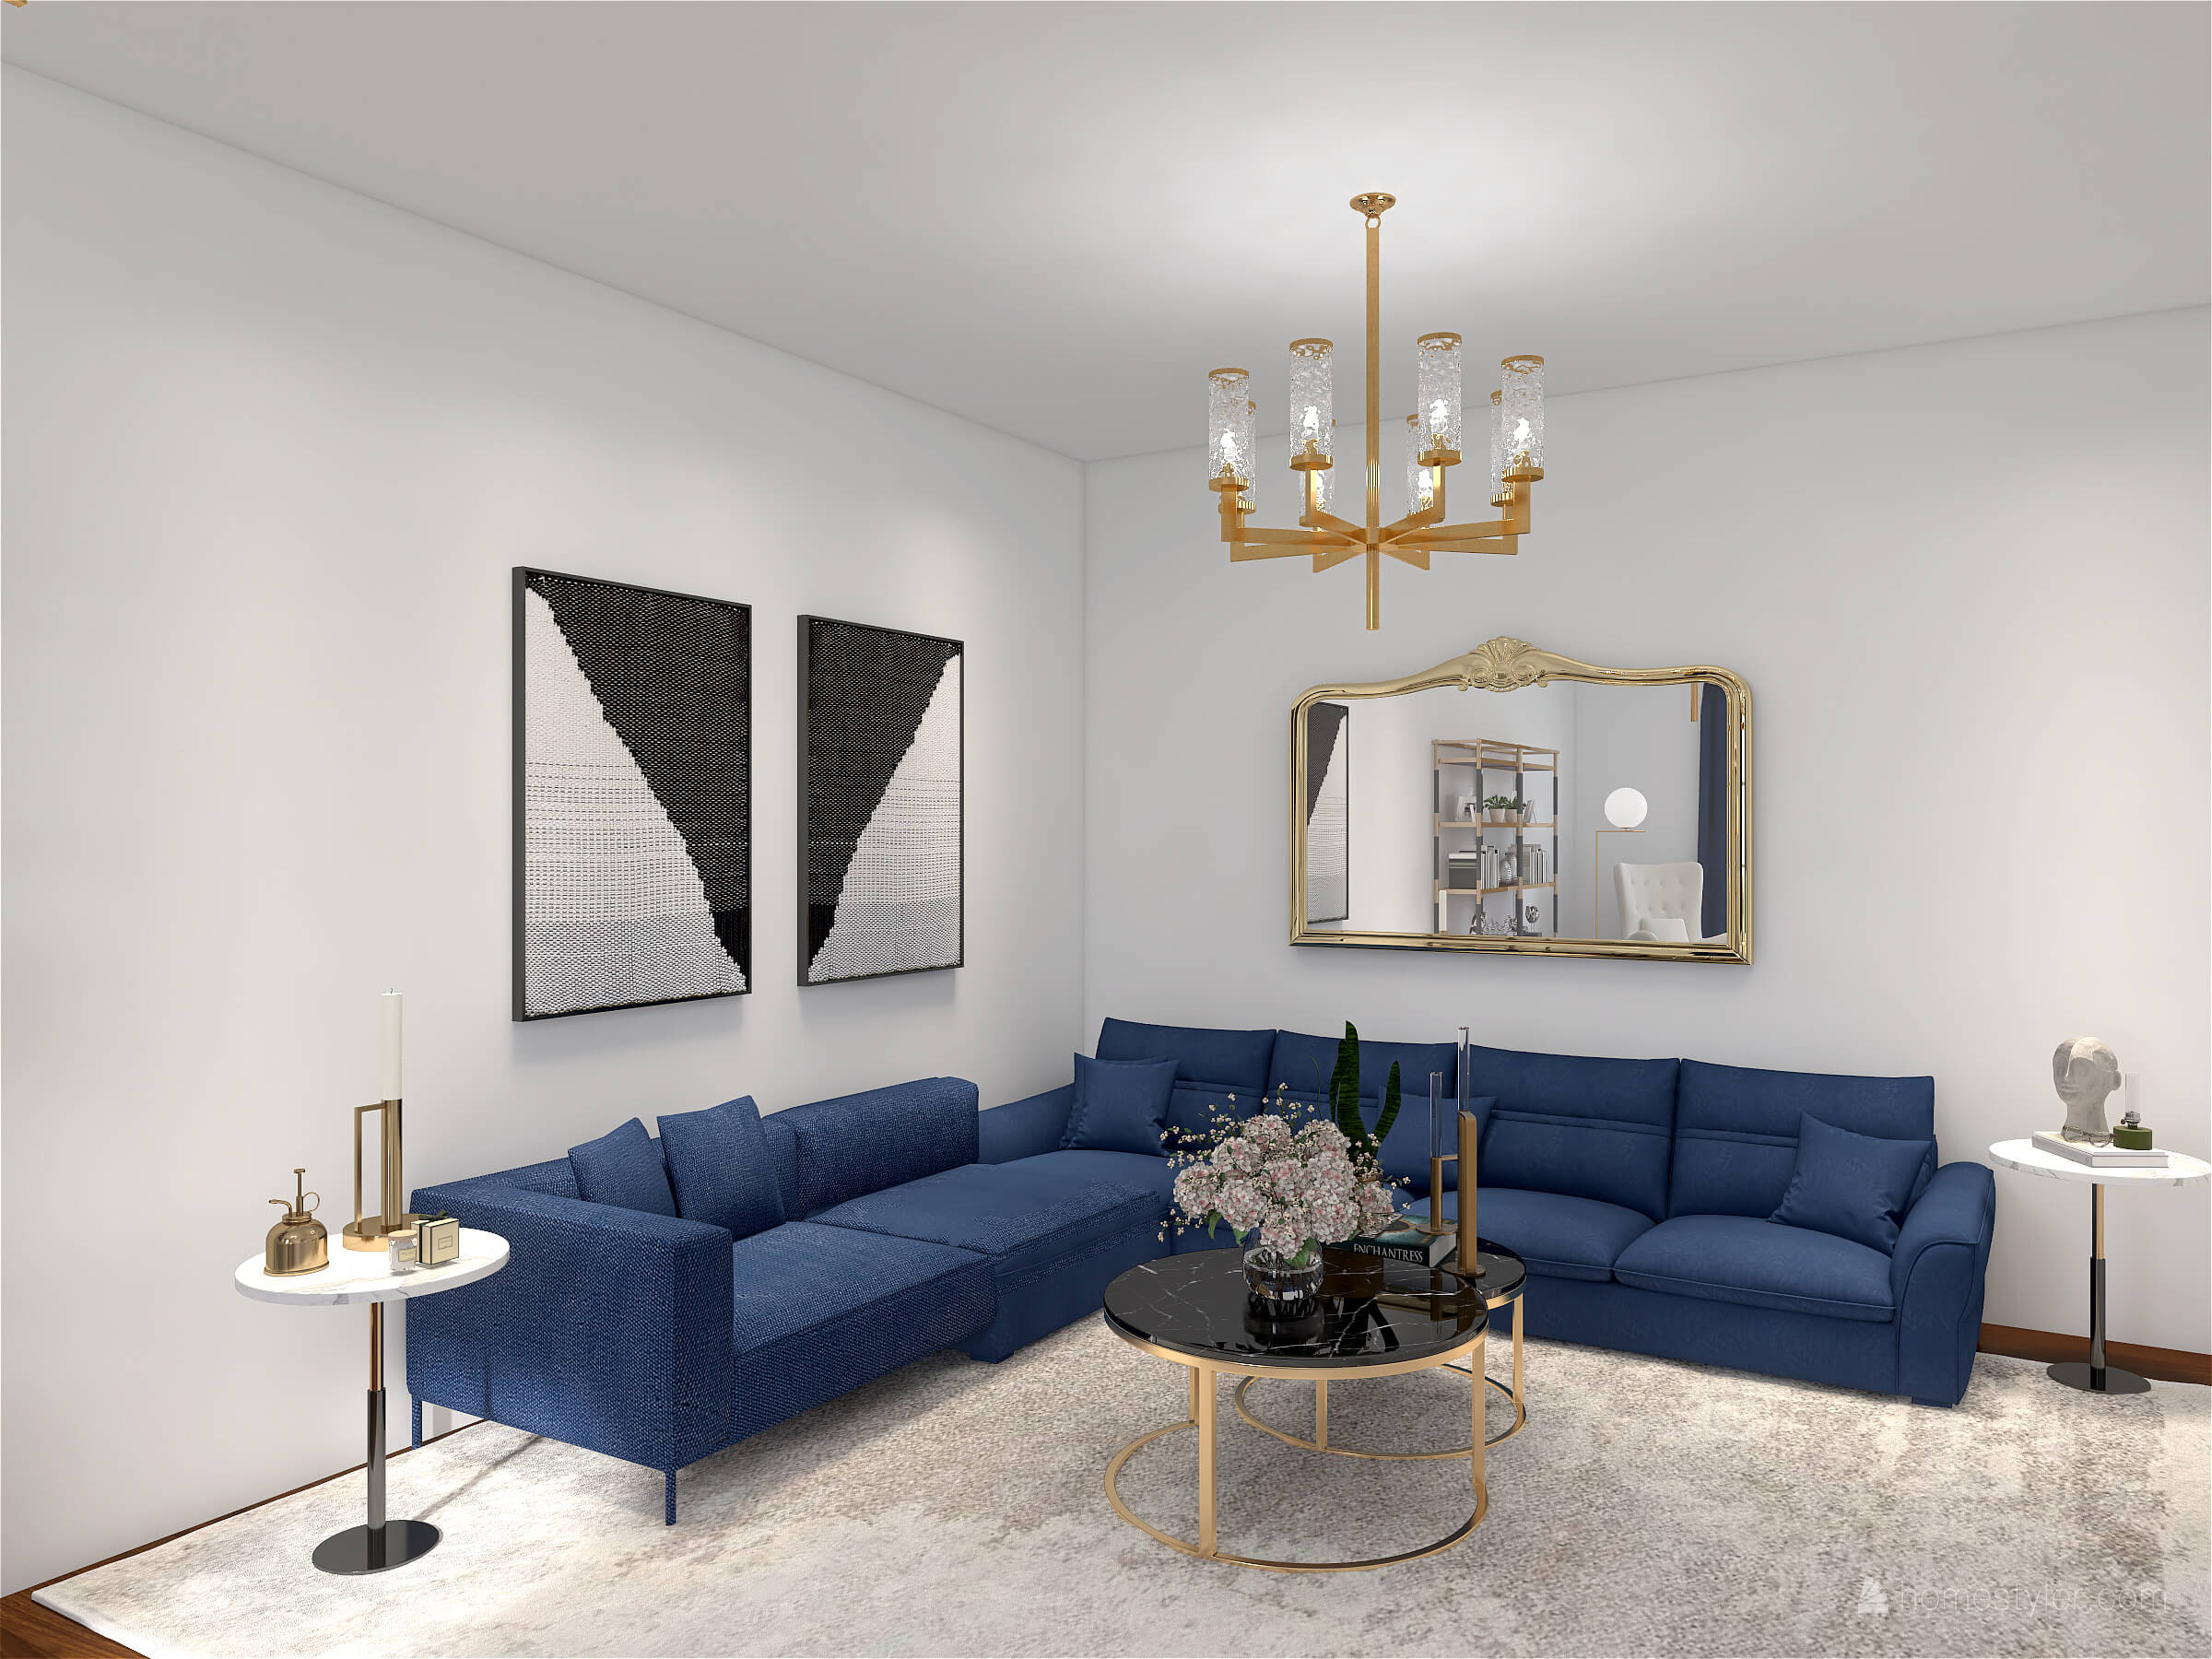
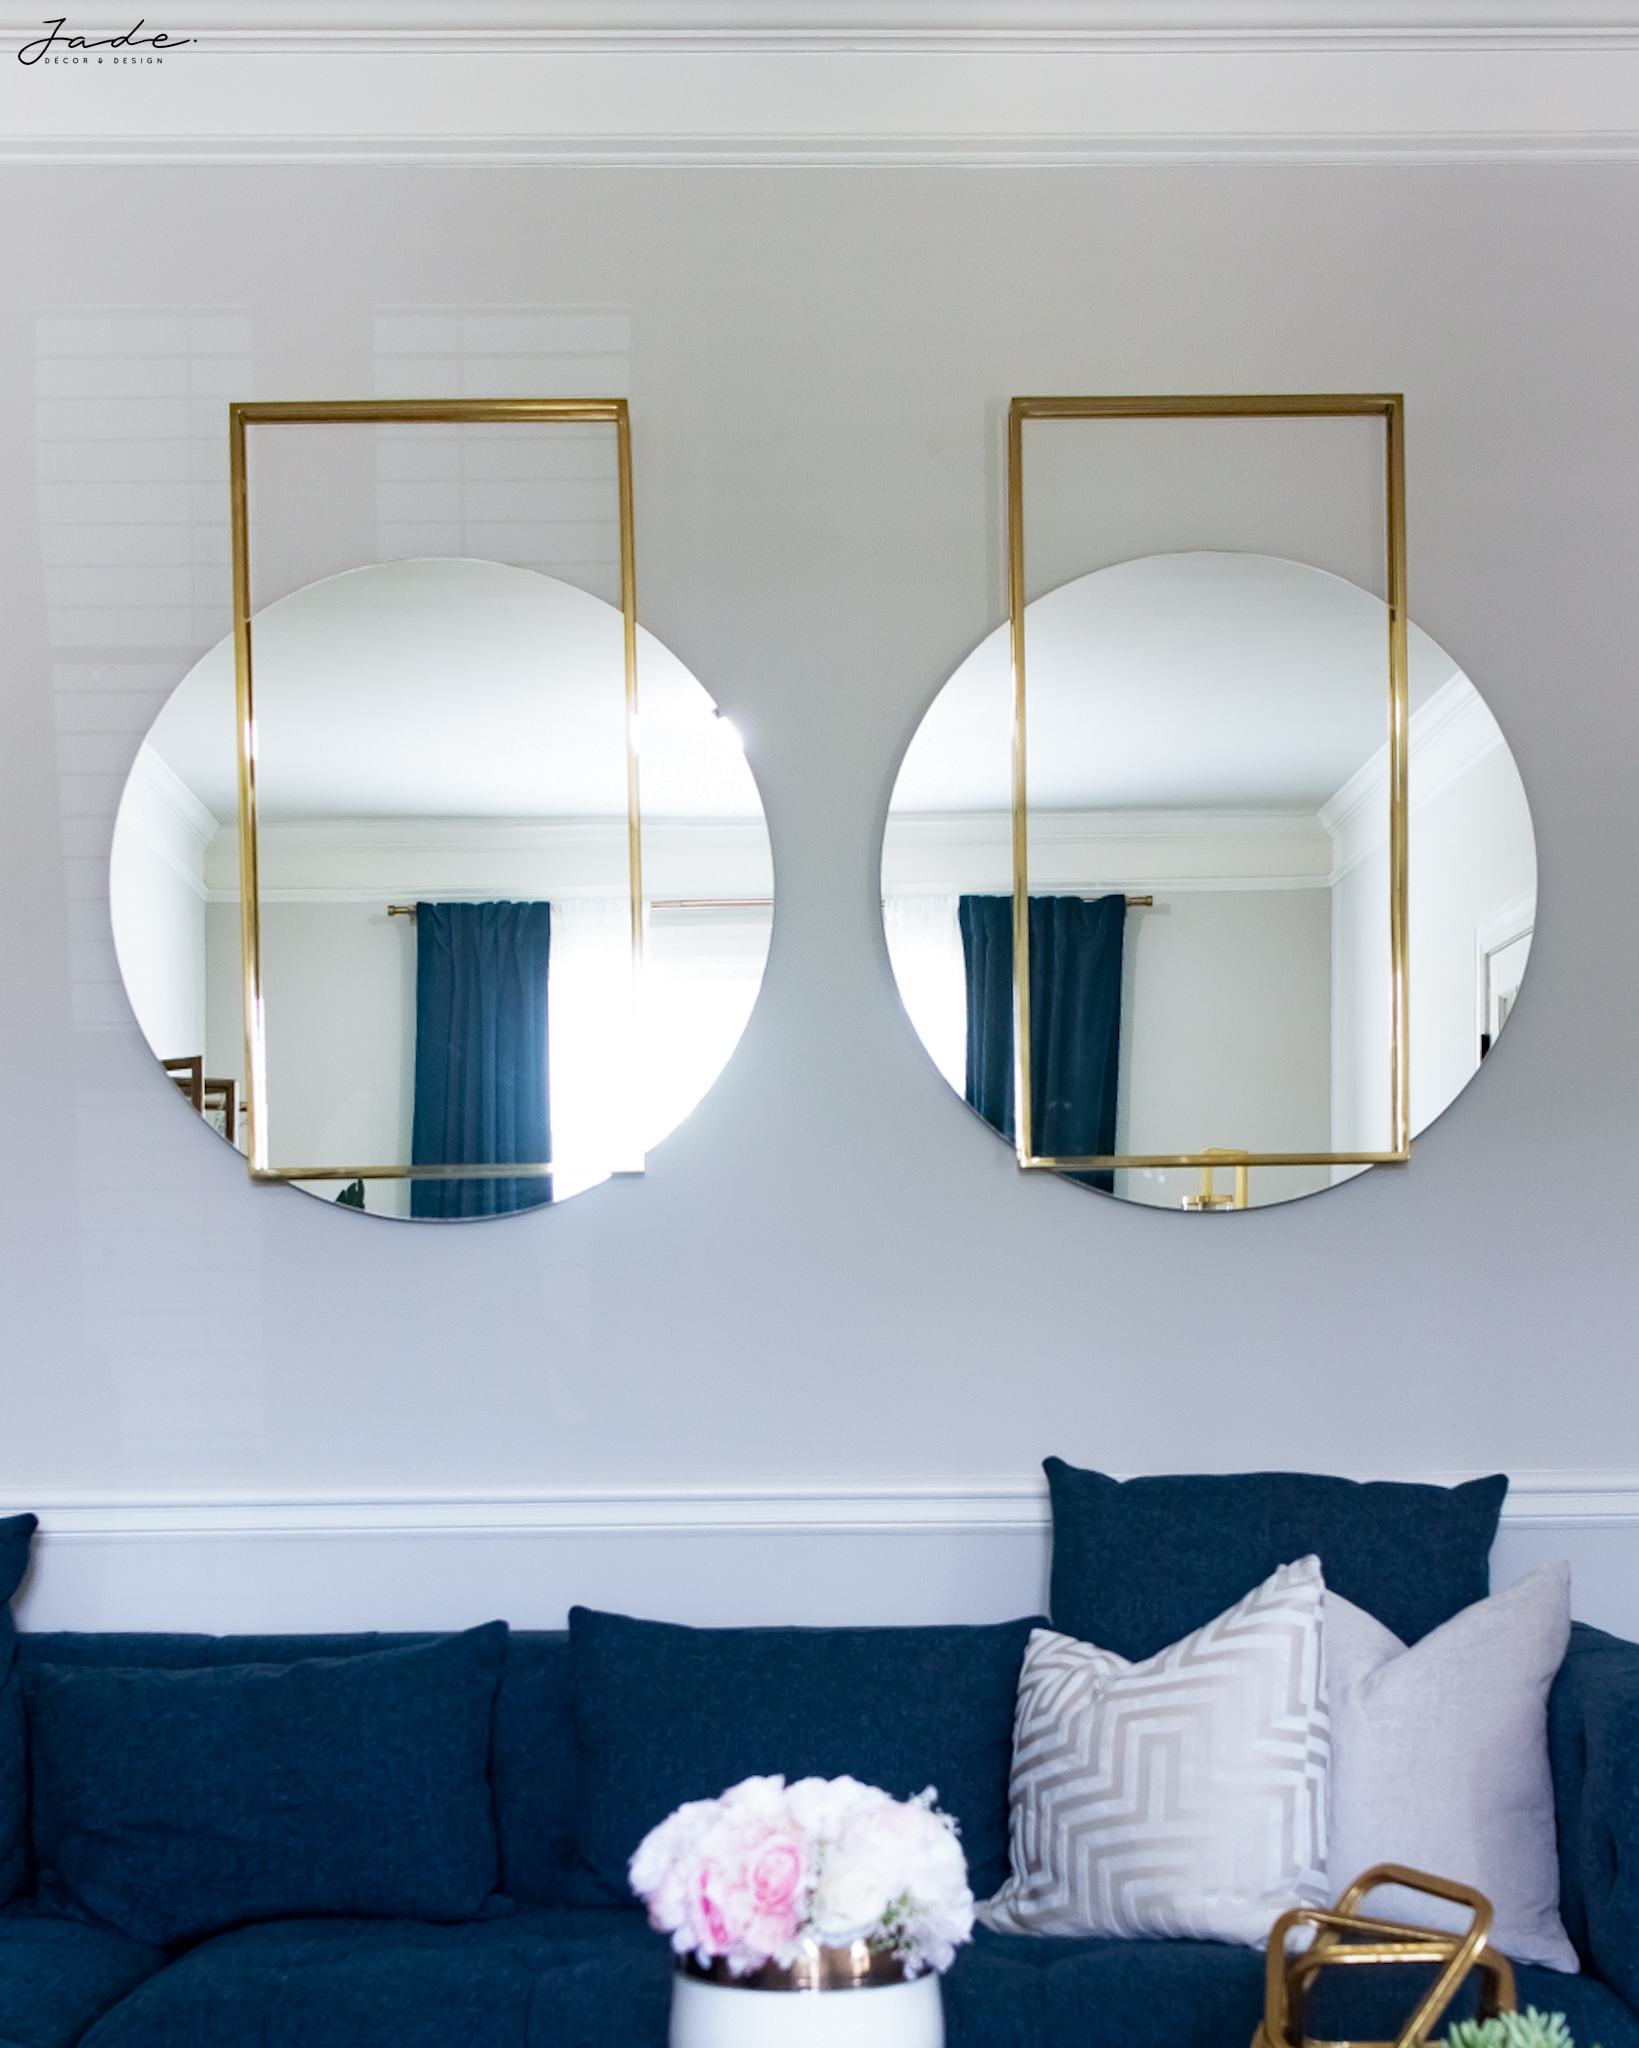
Even though I am a planner by nature, I allow for some flexibility in my design. For example, I initially planned to have 1 large mirror on the wall and 2 paintings (based on my render) but I ended up with 2 mirrors on the wall and 1 painting. While searching for the perfect mirror, I stumbled on these beauties from WestElm and I couldn’t resist so I switched up my plan.
I’m so happy with the way this living room turned out. Its definitely going to evolve over time as I switch things out here and there. The next big transformation that would happen to this living room will be adding grass cloth or textured wallpaper. If you know me, you know I am obsessed with grass cloth wall paper! But for now, I love this room so much and I hope you do too.
[do_widget id=custom_html-14]
Thank you for spending this time with my musings. Feel free to reach out if you have any questions. I’ll see you in my next post!
![]()